Messages that are personalized for a specific target audience always perform better than the spray-and-pray, one-size-fits-all campaigns. Everyone understands that, but not everyone takes to the time to set it up. The process of segmenting users seems daunting. It shouldn't. With OneSignal, you can integrate with your existing data management platform (DMP) to create custom campaigns. Here's how...
Link Your DMP with OneSignal
Before you can start sending targeted messages, you want to give each user a unique identifier - it's a randomly generated ID number. There are two ways to achieve this: you can link your internal user record with OneSignal's system, or store OneSignal's user record within your DMP.
Once each user has a unique identifier, our event handlers tell us if/when a user subscribes to notifications. This is crucial because you only want to send push notifications to people who have opted in - if you try sending to all users, you risk losing the ability to send any push notification, ever - scary right?
Read Documentation: How to link your DMP
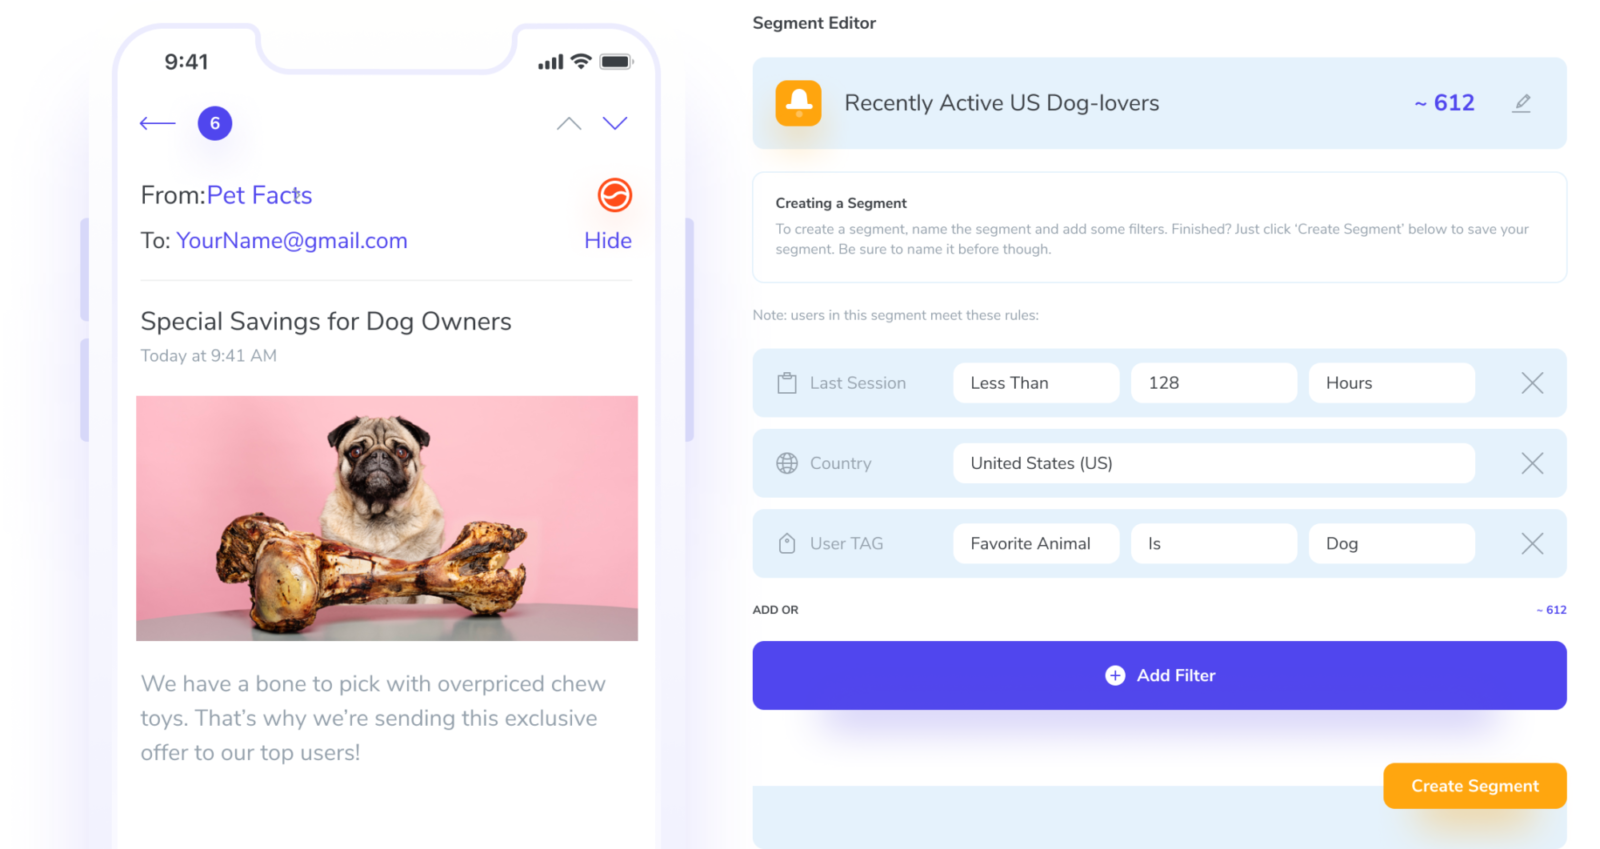
Define Segments
Use the OneSignal REST API to define segments. Filters are a powerful way to target users, allowing you to use data from OneSignal in combination with the Tags in your DMP. Filters can be combined together to form advanced, highly precise user targeting.
OneSignal customers apply all sorts of filters including location, interests, sex, and/or actions they’ve taken. For example, Evino uses segments to target customers based on what type of wine they've previously purchased, how much they typically spend, and their location data. Personally, I like pinot noirs and I'm budget conscious - I appreciate that Evino doesn't send me notifications about Cristal Champagne or local offers outside of my city. They send push notifications at least once a day, but they're always incredibly relevant. That's how they're able to drive 7,200+ orders via push notifications.
Tip: Set it and forget it - OneSignal can auto-tag your users by the page they were on when they first subscribed to notifications and/or by the notification topic they previously clicked on.
The filters parameter targets notification recipients using an array of JSON objects containing field conditions to check. The following are commonly used filter field options:
last_session= number of hours before or after the users last sessionfirst_session= number of hours before or after the users first sessionsession_count= number sessionssession_time= time in seconds the user has been in your appamount_spent= The amount the user has spent on in-app purchasesbought_sku= SKU of item purchased in your applanguage= language of the user (you can in multiple languages)app_version= version of the mobile app the user is onlocation= the location radius (in meters) to place by latitude and longitudecountry= location of the user
Read Documentation: How to set up segments based on filters
Send Messages
Once you've established who you want to send messages to, composing message takes no time at all. Just enter a title, message, URL of where you want people to go, and set the delivery time.
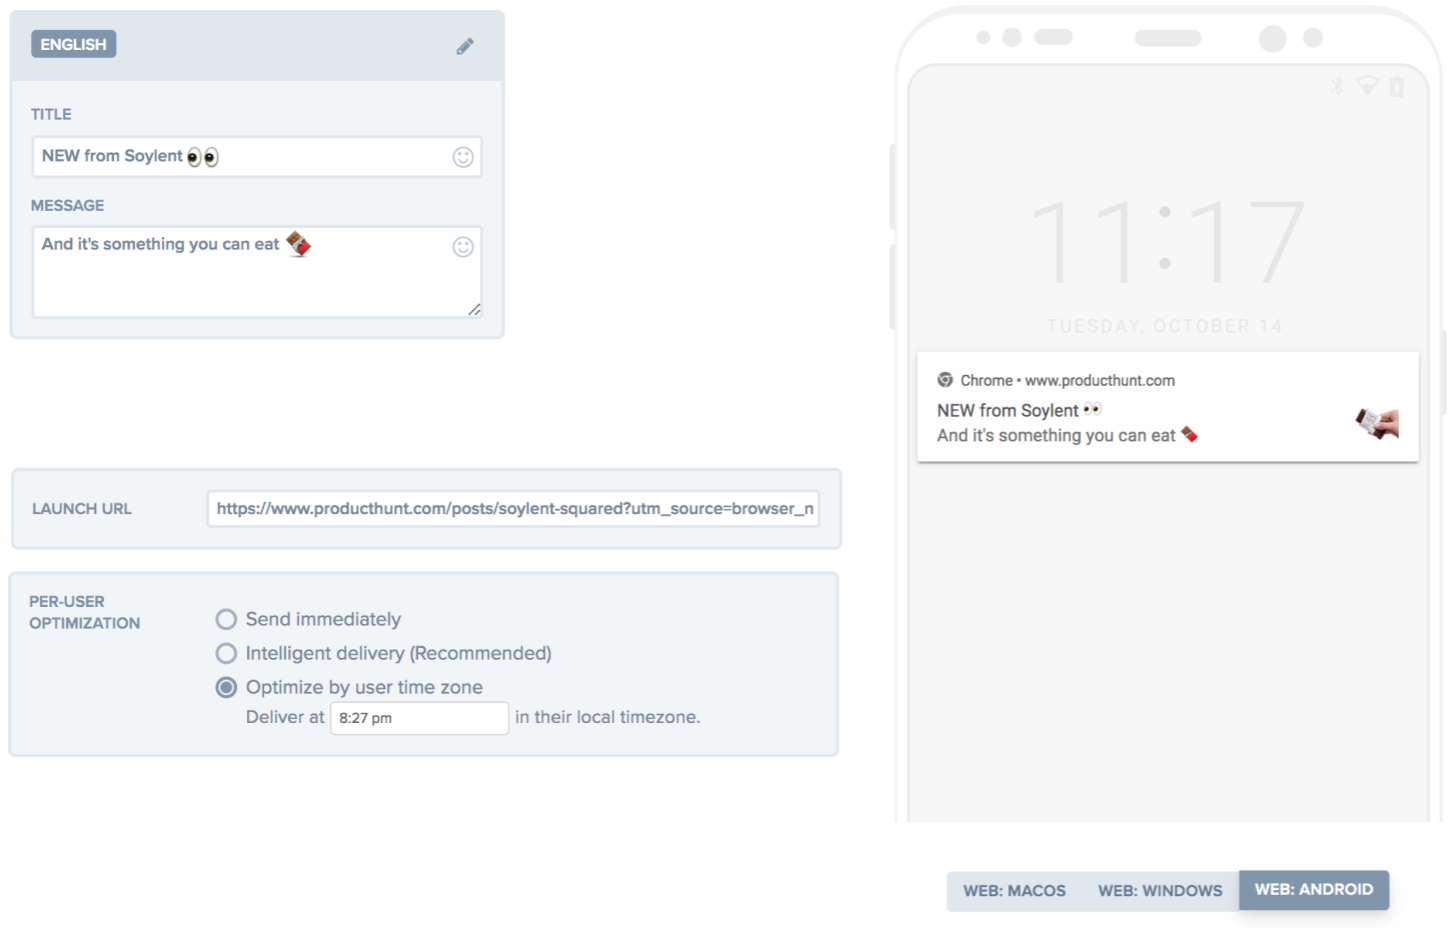
There are plenty of additional features such as badge, icon, and action buttons, but you don't need to mess around with those for every single notification.
Tip: Set your preferred badge, icon, and buttons for a message and save it as a template. This will save you lots of time in the future. Also keep an eye out for notifications that perform exceptionally well and save those as templates - OneSignal customer 9GAG uses 23 different templates!
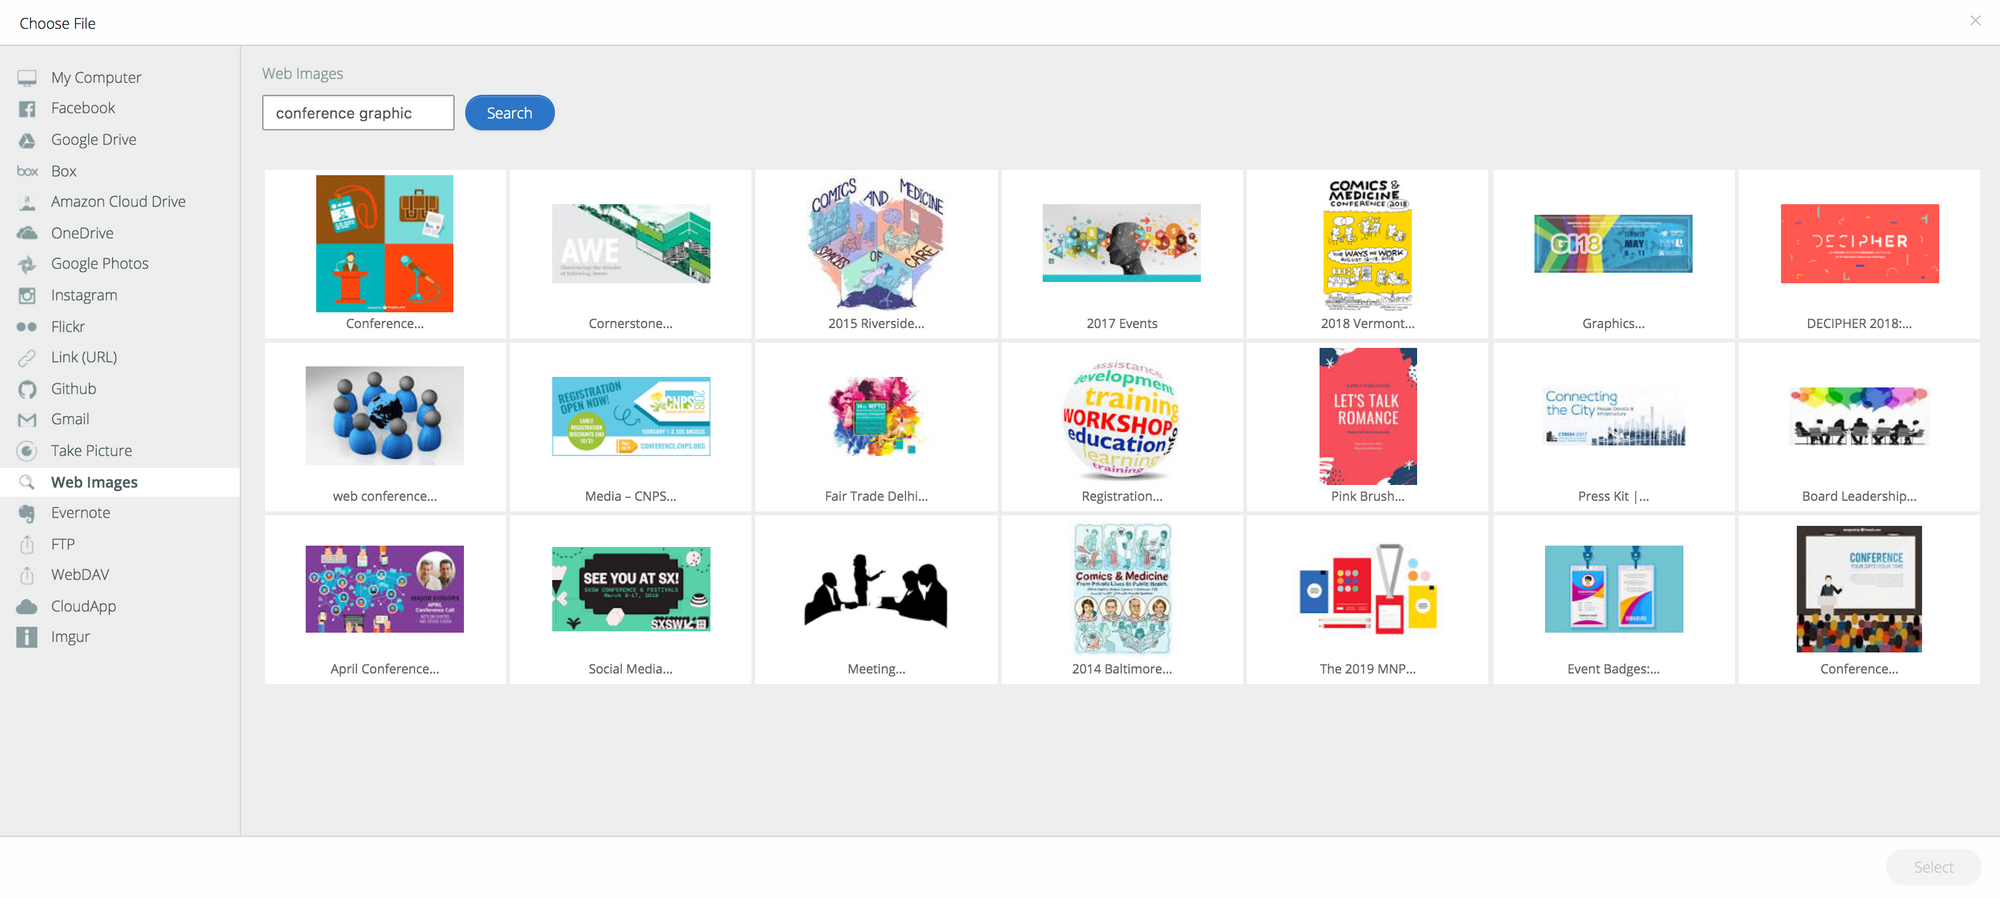
I send notifications for OneSignal on a regular basis, and honestly, it takes me less time to compose a push notification than a Tweet. It's easier because emojis are right there in the OneSignal message box 😎🙌📲 ...and I can pull images from anywhere. When I'm in a rush, I use the "web image" feature to search for a graphic and voila, it appears in my push notification.
Read Documentation: Create a Notification
Track Performance
After you send a message, you'll want to track performance. OneSignal provides Dashboard Delivery Statistics to see view delivery and click through rates in real time. If your a Wordpress site you can track conversions using our own WP plugin.
Tip: Export your notification data for deep analysis. You'll be able to see when the message was sent, delivery performance, message content, segments, and more. It's one of the many features included with OneSignal's paid plans.
OneSignal also supports many third-party tools. Here’s a list of analytics platforms we integrate with and how to set them up. If you already use an analytics tool, chances are we integrate with it - we work with Zapier to connect with 1400+ apps and platforms.
Read Documentation: Integrating OneSignal with Third Party Platforms