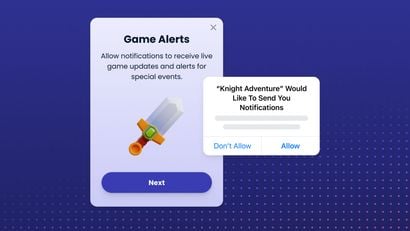
In-app messages (IAM) are highly customizable pop-up interstitials that mobile app user receive inside your application. Unlike push notifications, IAM doesn’t require opt-in permission and they only show when the users are actively using your application.
OneSignal & The In-App Messages (IAM)
It’s no secret that in-app messages can help you engage and retain app users. This tutorial will show you how to integrate the React Native Expo Plugin(manged workflow) to leverage IAM in your React Native app.
Some valuable use cases for IAM include:
- User Onboarding: Guide your users through getting started with your application. Use an in-app slide carousel to build an effective onboarding process, introduce them to key application features, and emphasize the value your app will provide.
- Announcing New Products & Features: Inform your users when you have added new products and features to the application to improve adoption and enhance the UX.
- Requesting Push Permission & Location Access: Provide users with more context to inform their opt-in decision or request location or other access permissions that are vital to your application.
- Encouraging Referrals: Allow your users to invite their friends to your application with a single click to grow your active users and build community.
This tutorial will cover how to integrate the React Native Expo OneSignal Plugin (managed workflow) into your app in order to gain in-app messaging functionality. Part one of this guide covers the OneSignal setup process. Part two of this guide covers how to integrate OneSignal with React Native using our NPM package.
This plugin is an Expo Config Plugin. It extends the Expo config to allow customizing the prebuild phase of managed workflow builds (no need to eject to a bare workflow). For the purposes of OneSignal integration, the plugin facilitates automatically generating/configuring the necessary native code files needed to get the OneSignal React-Native SDK to work. You can think of adding a plugin as adding custom native code.
Guide Overview
- Part 1: Set up Your OneSignal Account (for free!)
- Part 2: React Native/Expo Setup
- Part 3: Send an In-App Message to you device
This tutorial requires some basic knowledge of React Native (Expo). I'm using the Expo CLI to generate my project and NodeJS version 14.16.
Additional React Native Setup Resources:
Part 1: Set Up Your OneSignal Account
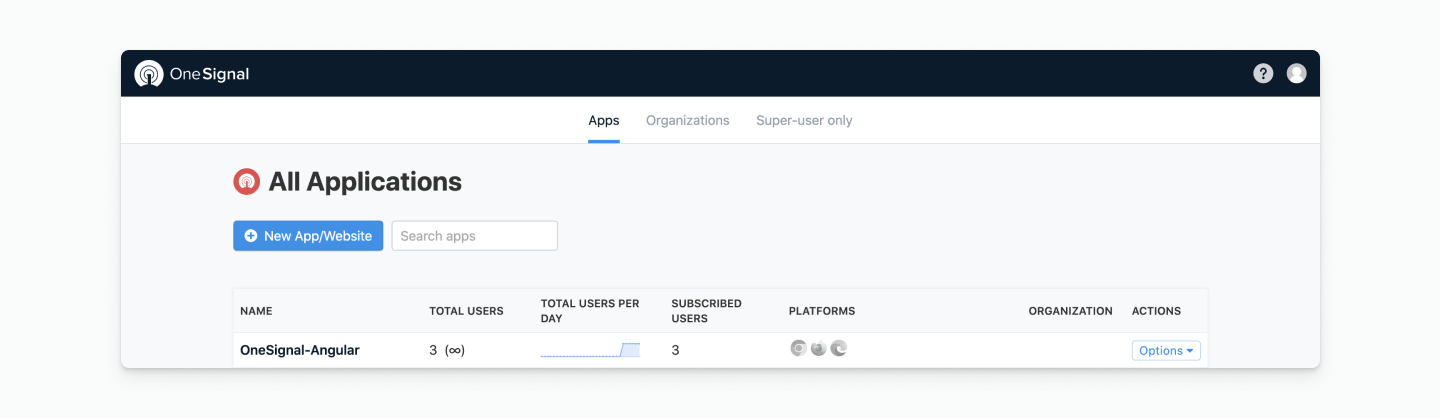
To begin, login to your OneSignal account or create a free account. Then, click on the blue button entitled New App/Website to configure your OneSignal account to fit your app or website.
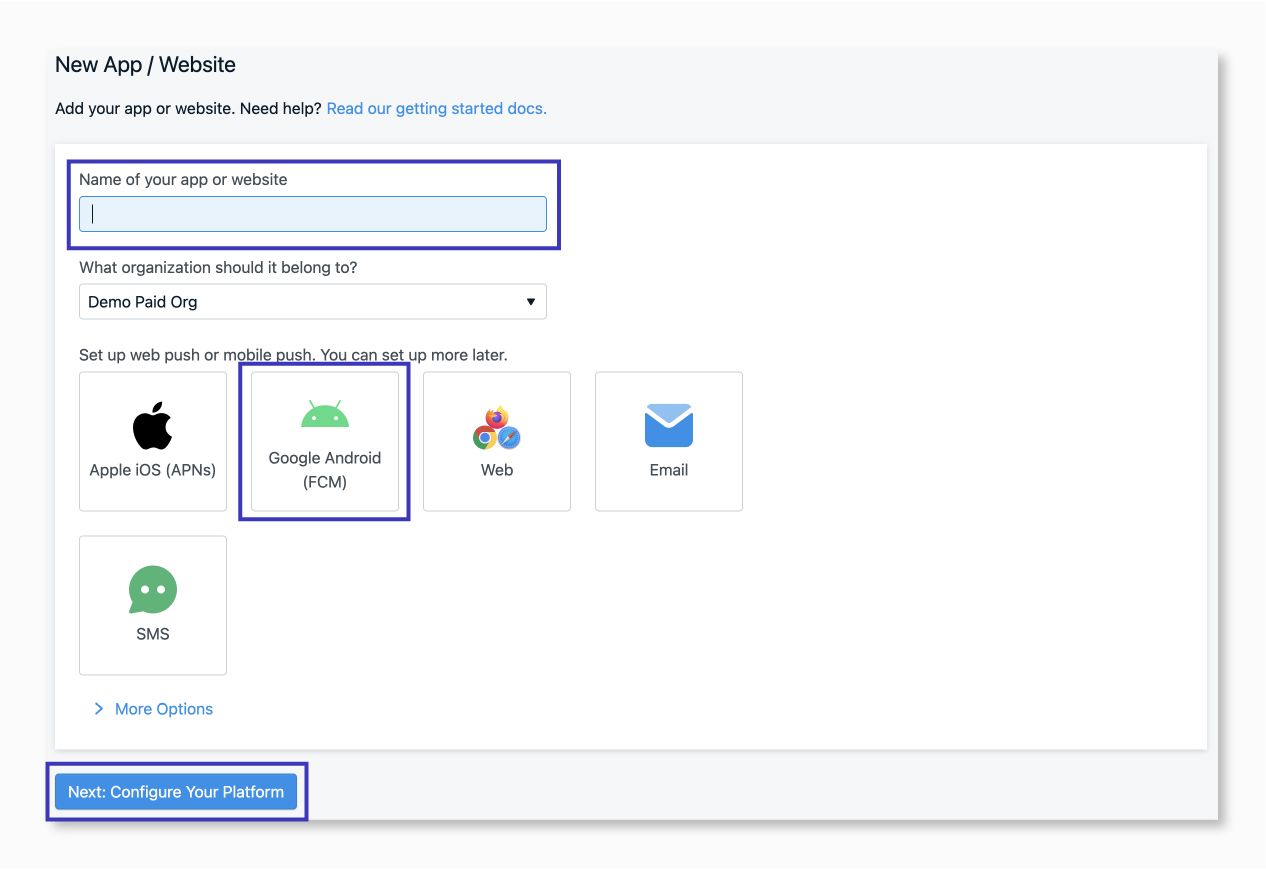
Insert the name of your app or website. Select Google Android as your platform.
Click on the blue button entitled, Next: Configure Your Platform.
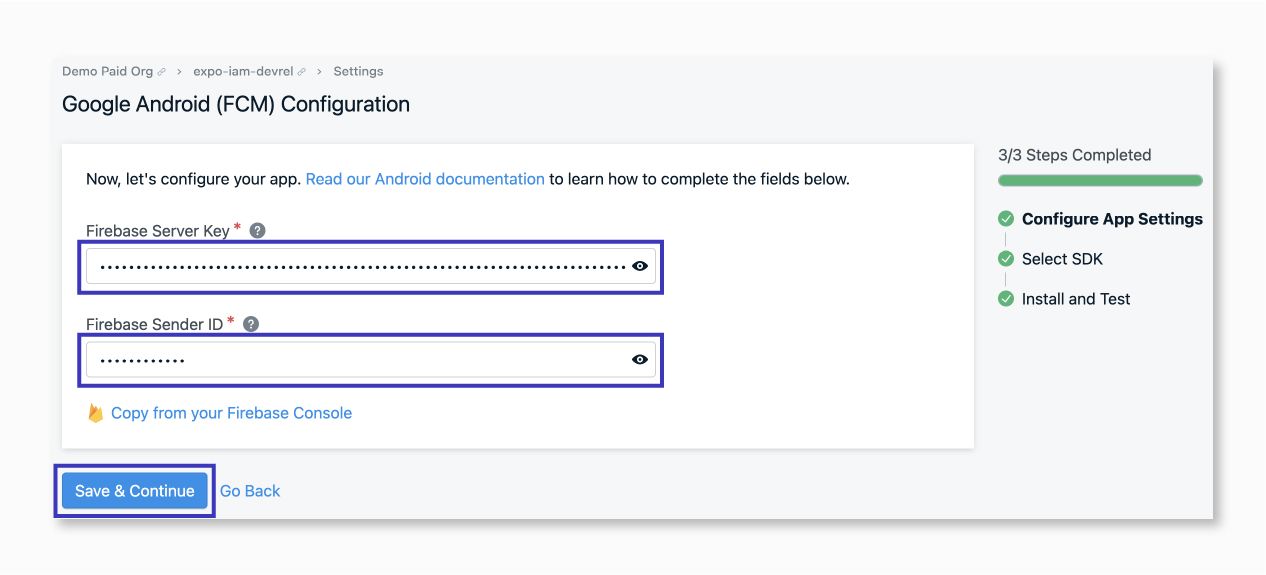
Google Android FCM Configuration
It’s time to configure your Android app using a Firebase Server key. All Android apps require this key and the server ID if you want to send push notifications. If you don’t have the Firebase Server Keys, take a look at our documentation to learn how to generate a Firebase server API key.
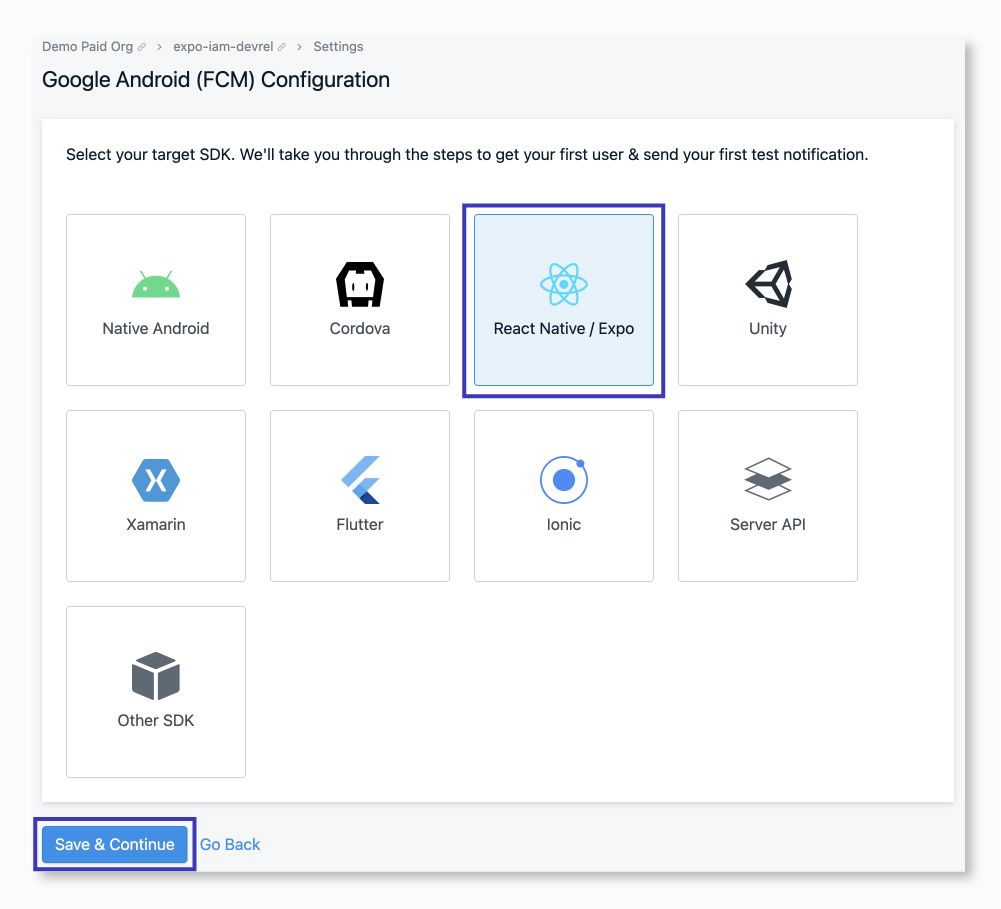
Now select your target SDK. We'll take you through the steps to get your first user and send your first test notification.
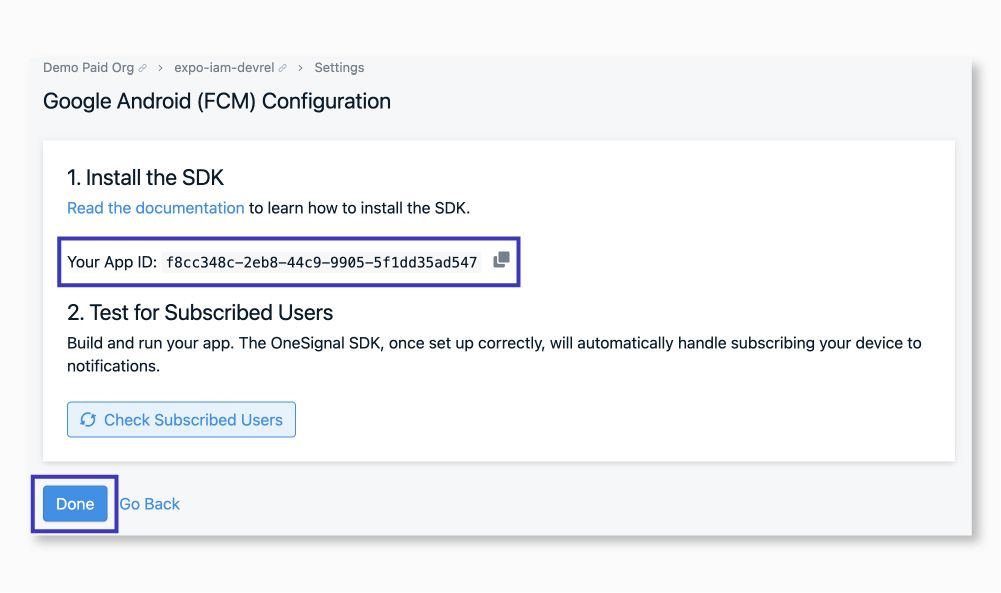
On the next screen that appears, you will see your app ID — copy that app ID because you will use it inside of your Expo Application. DO NOT click to Check Subscribed Users or Done yet.
Part 2: React Native (Expo) Setup
Creating Your React Native App
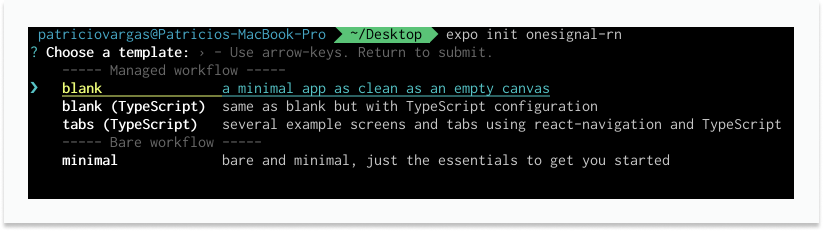
Inside of your terminal, run the following commands to create a new React Native project using Create Expo App:
expo init onesignal-rn-expoWhen asked, select any of the options under the Managed Workflow. In my case, I selected the first option, which is blank.
cd onesignal-rn-expo
expo start
For the official Expo, documentation click here.
Install OneSignal Expo Plugin
Inside of your project folder, open your terminal and run the following command to install the OneSignal Expo Plugin package.
expo install onesignal-expo-pluginNext, install the React Native OneSignal plugin by running the following command:
yarn add react-native-onesignalEven though onesignal-expo-plugin defines react-native-onesignal as a dependency and it gets put into the node_module, it will make sure the native parts get built.
If you forgot to run the following command after you have built your project, you can fix this by running expo prebuild --clean. This should delete android and ios build folders and do a clean native build, then run the yarn add react-native-onesignal.
Configuration in app.json / app.config.js
Inside the app.json/app.config.js file, add the plugin to the plugin array:
App.json
{
  "plugins": [
    [
      "onesignal-expo-plugin",
      {
        "mode": "development",
        "devTeam": "91SW8A37CR"
      }
    ]
  ]
}
or
App.config.js
export default {
...
plugins: [
            [
            "onesignal-expo-plugin",
                {
                    mode: process.env.NODE_ENV || "development",
                    devTeam: "91SW8A37CR"
                }
            ]
		]
};
Plugin Options
mode: used to configure APNs environment entitlement. The following two options are valid values for the mode property.
-"development"
-"production"
devTeam: *optional* used to configure Apple Team ID. You can find your Apple Team ID by runningexpo credentials:manager.
Example:
{
    "extra": {
    	"oneSignalAppId": "<YOUR APP ID HERE>"
    }
}
You can then access the value to pass to the setAppId function:
import OneSignal from 'react-native-onesignal';
import Constants from "expo-constants";
OneSignal.setAppId(Constants.manifest.extra.oneSignalAppId);
Alternatively, pass the OneSignal app ID directly to the function:
import OneSignal from 'react-native-onesignal';
import Constants from "expo-constants";

OneSignal.setAppId("YOUR-ONESIGNAL-APP-ID");
Run & Build your Application
expo prebuild
# Build your native iOS project
expo run:ios
# Build your native Android project
expo run:android
Part 3: Send an In-App Message to your device
I recommend you run the application on an actual Android device to test the in-app messages. To do so, you will need to connect your Android device and enable developer mode.
Once you have connected to the device and enabled developer mode, run the application on your device by selecting your device as the target device. In my example, I’m running the app on a Google Pixel 5.

Once you have opened the application on your device, the device will automatically be subscribed to notifications. Now, your device will be able to receive notifications sent by OneSignal.
To complete the setup process, return to your OneSignal dashboard to the point at which you previously left off. Click on the Check Subscribed Users button and a green message will appear like the one in the image below.
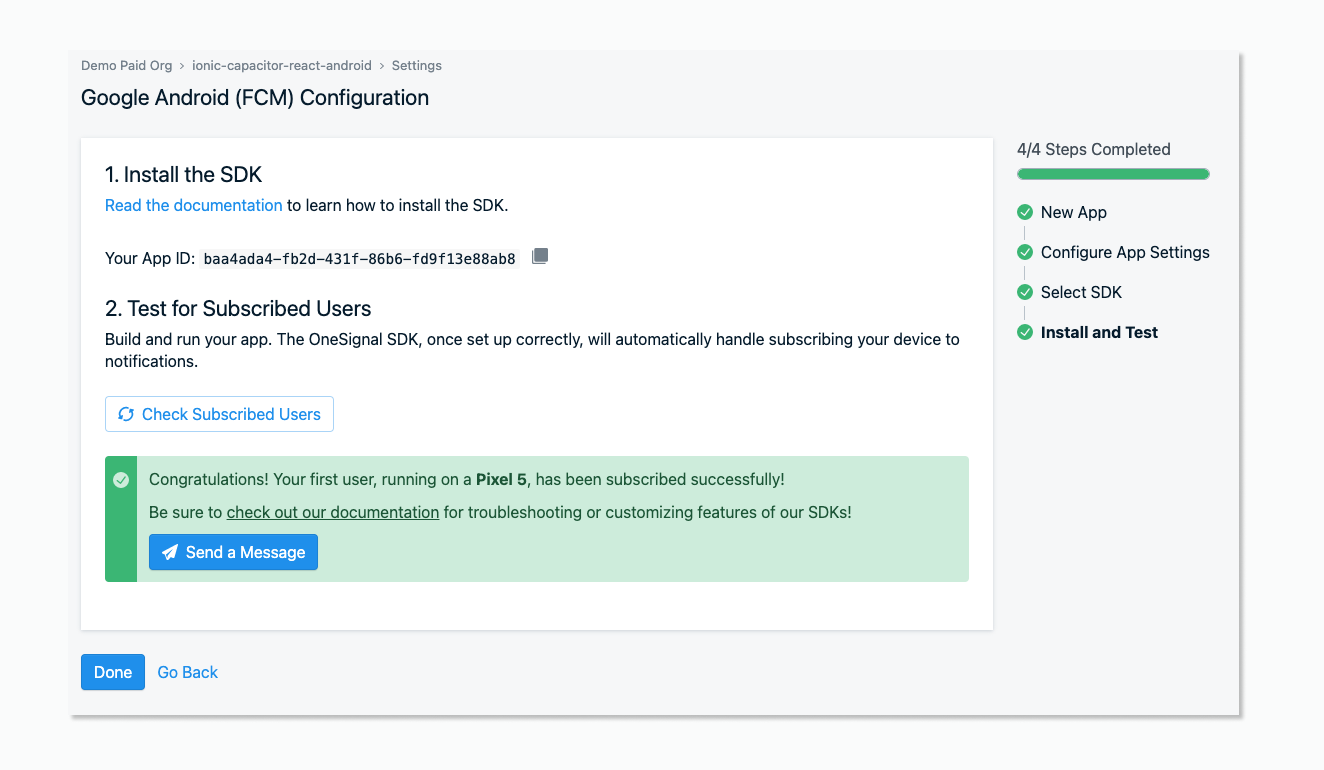
Click on the Done button.
Create an In-App Message
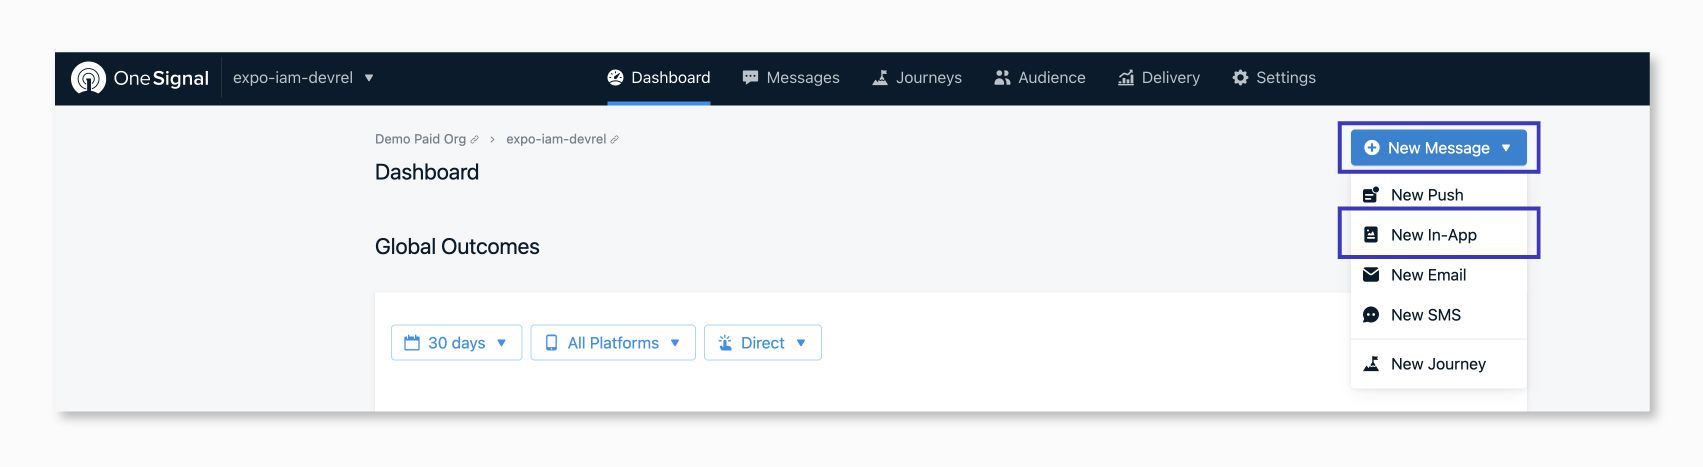
It’s time to send your first in-app message! To do so, login to your OneSignal account and navigate to the Dashboard tab. On the dashboard page, click on the blue button that says New Messages ->New In App and you will be redirected to a new page.
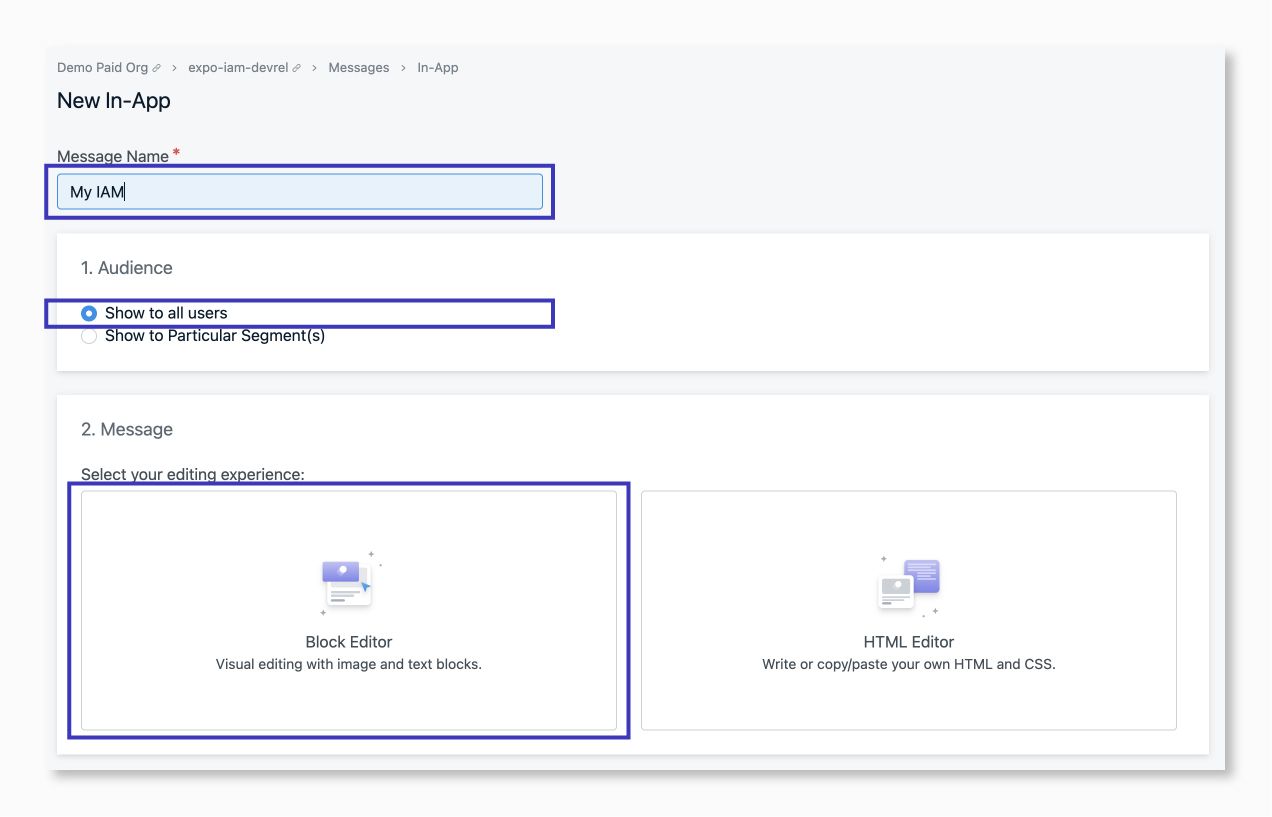
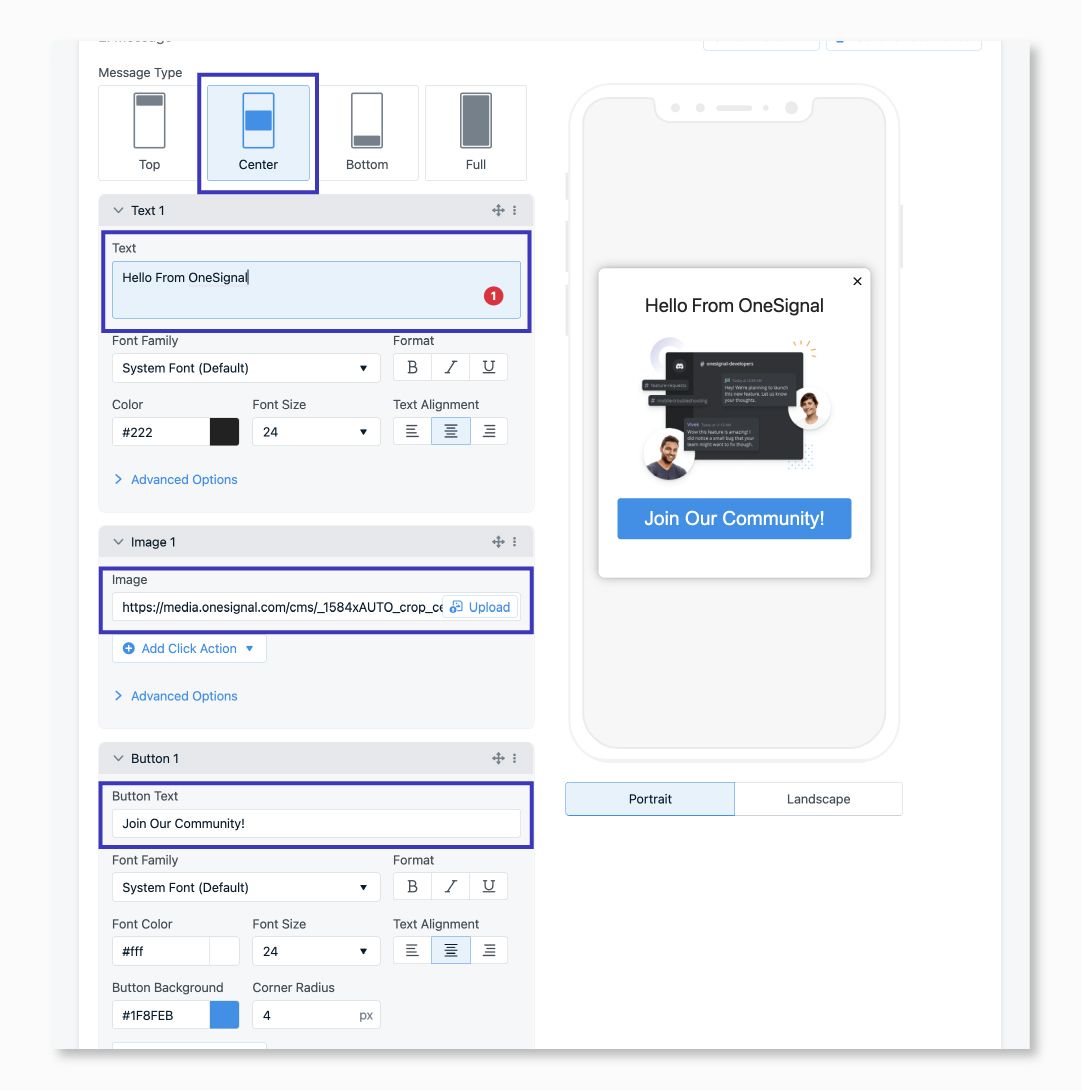
On this page, you customize the In-App Message, from the content to display, the position, the image, your audience, and more.
The first thing you have to do is enter the name of your In-App Message, then select your audience (In my case I'm selecting all users), and select Block editor. The block editor will have a visual user interface that will help you edit the looks of your In-App Message.
Once you have finishing configuring sections one and two, scroll down to the triggers section (Section three. For testing purposes, select the On app open option. This option will automatically trigger the in-app message to appear when the app is opened.

Lastly, in the Schedule section, make sure your configuration looks like the following:
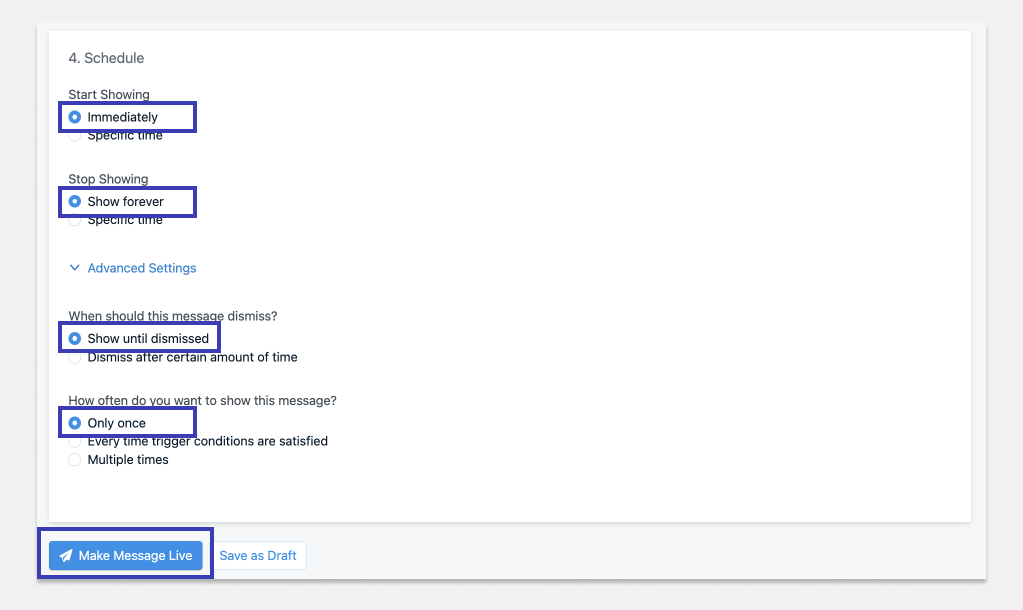
This configuration will send the message immediately and only once when you open the app.
Now it's time to set your in-app message live! To do so, click on the blue button that says Make Message Live.
As you saw this tutorial covers the basics of using IAM in your React Native Expo applications. If you want to take a look at the source code to follow along with this tutorial, you can find the code in the React Native (Expo) AIM Sample.
Now, it's time for you to start playing with the IAM and keep the users of your applications engaged.
Connect With Us
Don’t forget to follow the OneSignal Developers Twitter and join our Discord server to learn more and connect with the OneSignal community of developers around the world.
Join our Developer Community