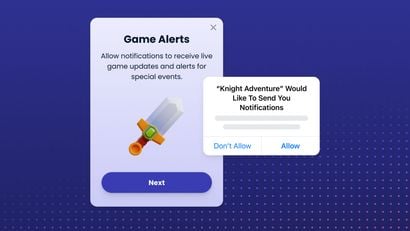
Did you know that implementing push notifications in your Android apps can increase user engagement and retention by over 85 percent? The overwhelming impact that push notifications have on app performance and long-term success make them a must-have feature.
Developing a push notification system from scratch is usually complicated and time-consuming. OneSignal makes it easy to implement notifications quickly and effectively on any mobile and web application. The best part is that it's free!
This how-to guide will provide instructions on how to add push notifications to an Android application built with Java and Kotlin using OneSignal.
Guide Overview
- Firebase Configuration
- Android Configuration
- OneSignal Configuration
- Add the OneSignal SDK to Your Android Project
- Send Your First Push Notification
For the purposes of this guide, we used the following tools and services:
- A Firebase Server Key
- A OneSignal account
- Android Studio Chipmunk
- Gradle version 7.3.3
- Physical or virtual device running Android version 4.0.3 or higher with Google Play Services installed.
Create an Android project
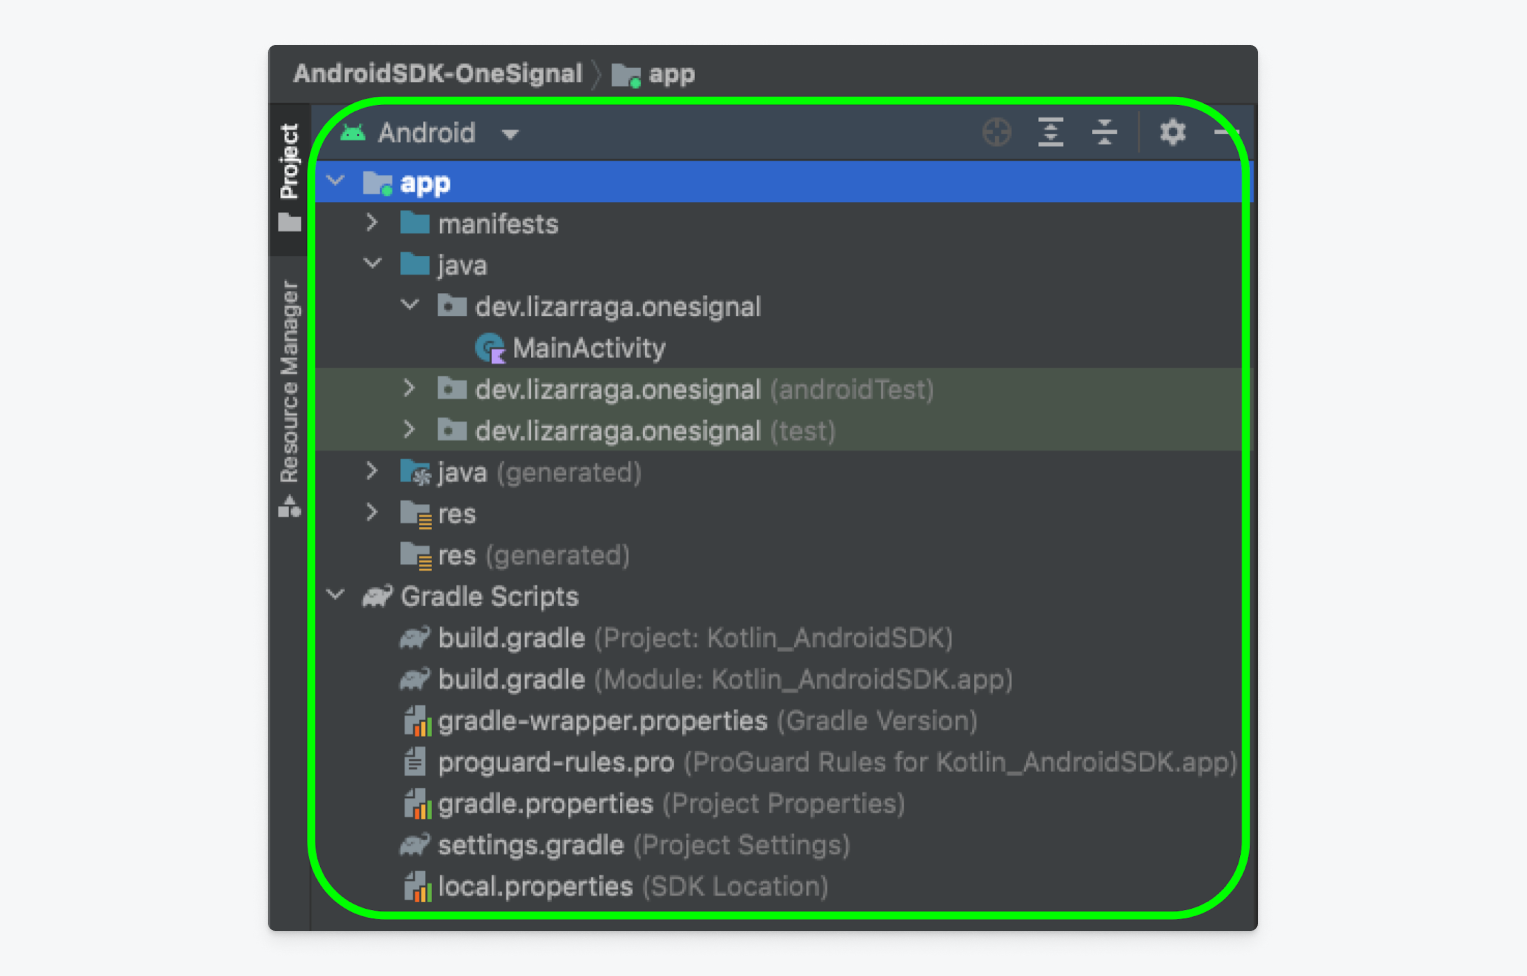
The first thing you must do is create a new Android project in the Android Studio IDE (You can use Java or Kotlin, the changes are not substantial).
Once the project has been created in Android Studio, your screen should resemble the image below.
Firebase Configuration
Now you must create a new project in Firebase. For Android applications, it’s necessary to have a Server Key and a Sender ID so that messages can be sent to Android devices using Firebase's Cloud Messaging services.
For this reason, the first thing you'll need to do is enter the Firebase console and click on Add Project.
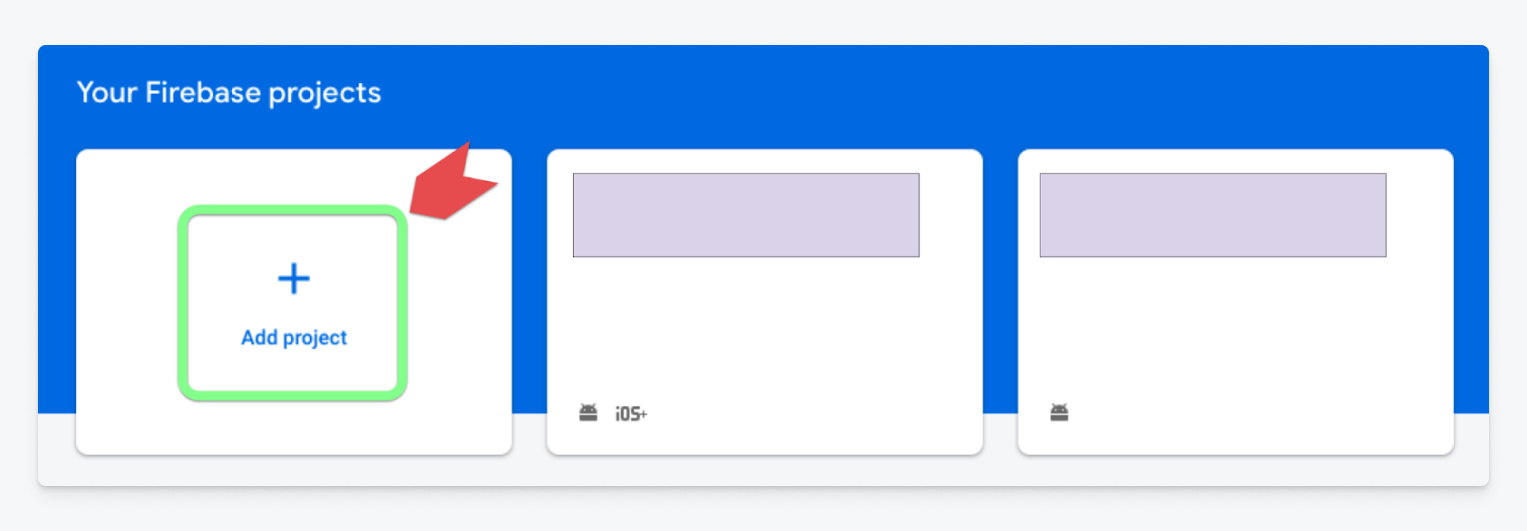
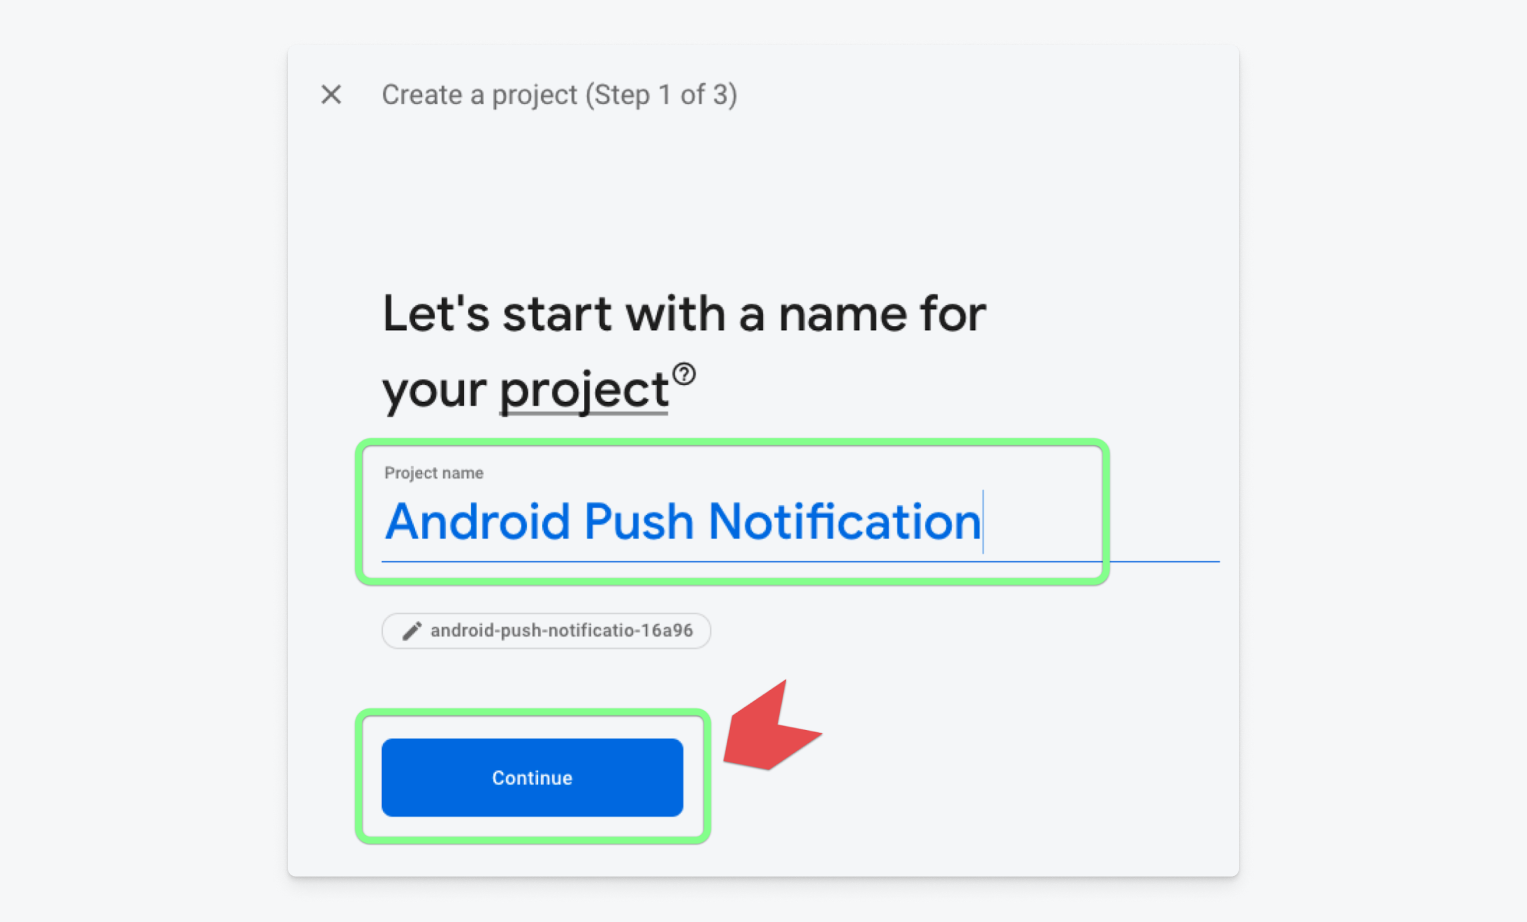
Enter a name for your project in Firebase and press the continue button.
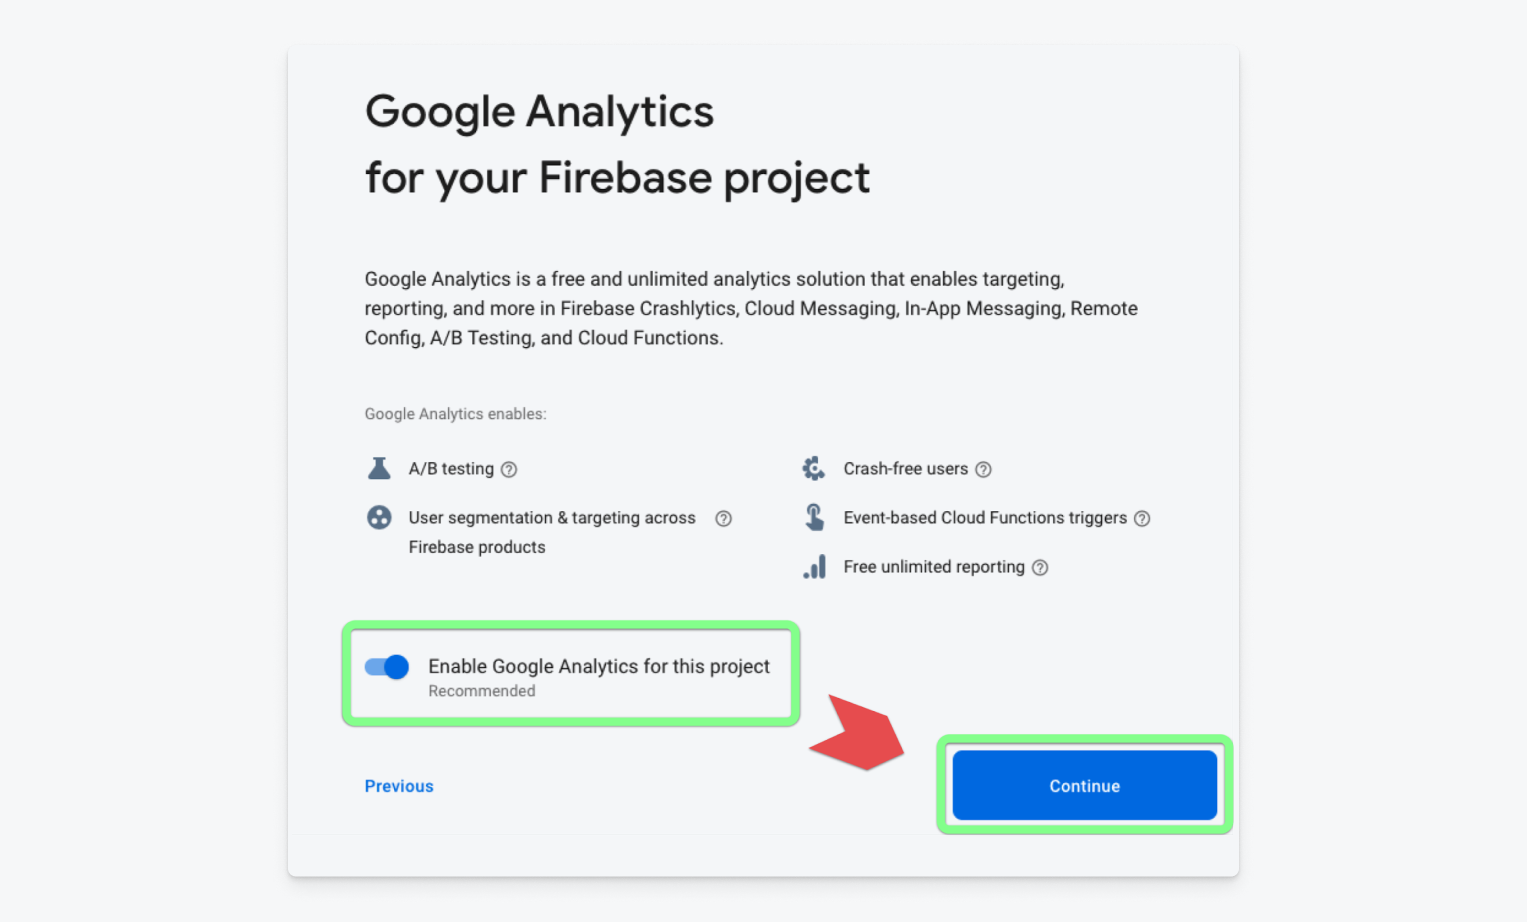
On the next screen, you will be given the option to enable Google Analytics for your project, which is necessary because Firebase Cloud Messaging is within the Google Analytics suite. Toggle Enable Google Analytics for this project to the right and click the Continue button.
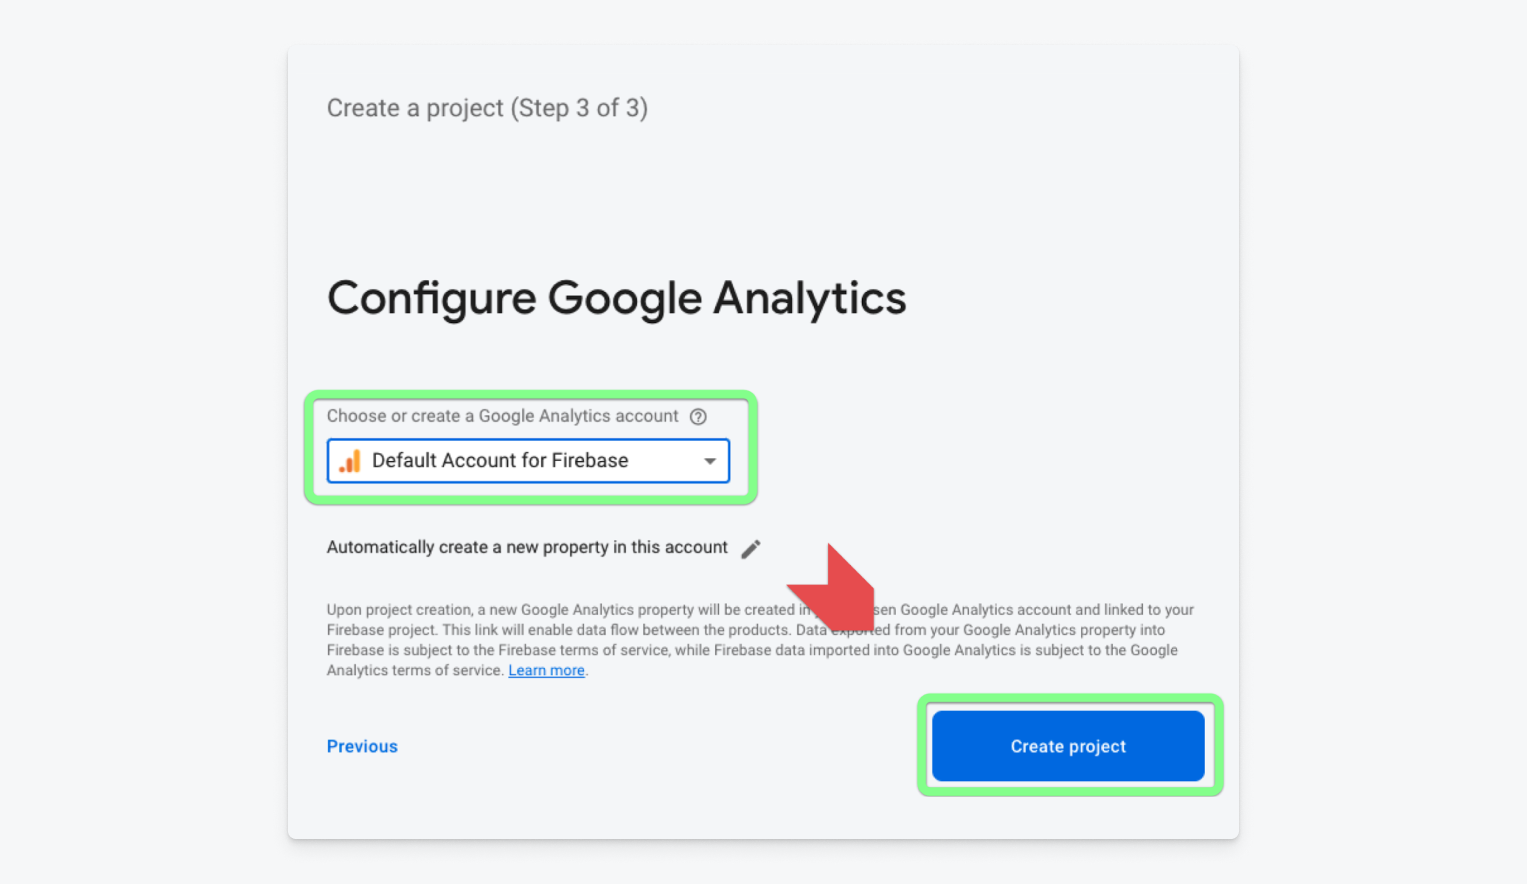
When enabling Google Analytics, you will be asked to create a Google Analytics account or select an existing one. For this demo, select the default option and click the Create Project button.
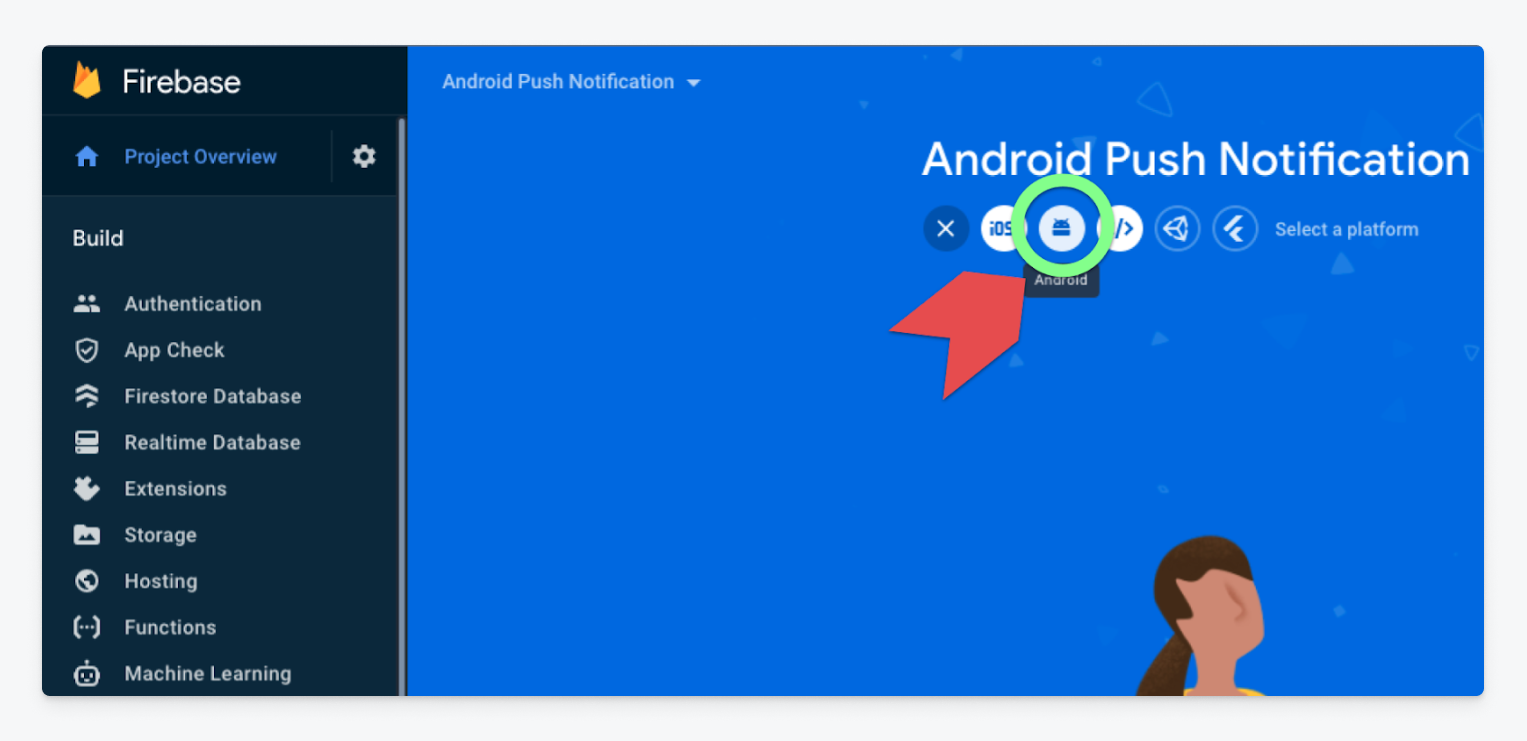
Now you'll need to connect Android Studio and Firebase. Therefore, once the project is created, it will direct you to the Project Overview screen in Firebase. Select the Android logo to add this platform.
Next, you'll need to configure the platform to connect the two projects. You will be prompted to provide one mandatory value and two optional ones. The mandatory value corresponds to the package name of your project in Android Studio. To find this, go to app/src/main/AndroidManifest.xml and look for the tag: package.
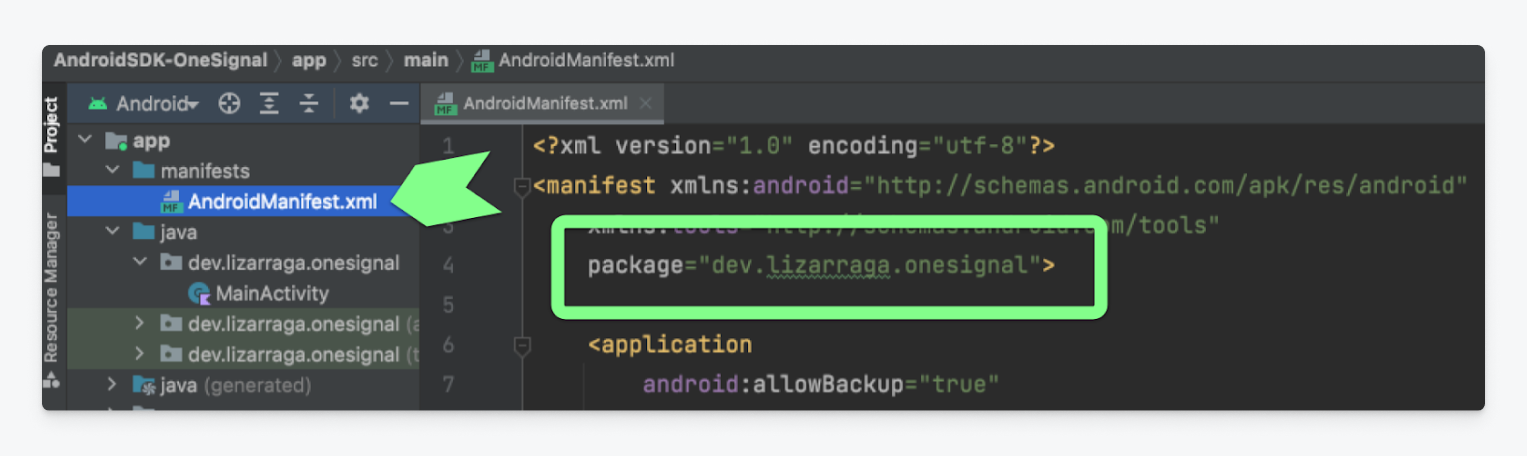
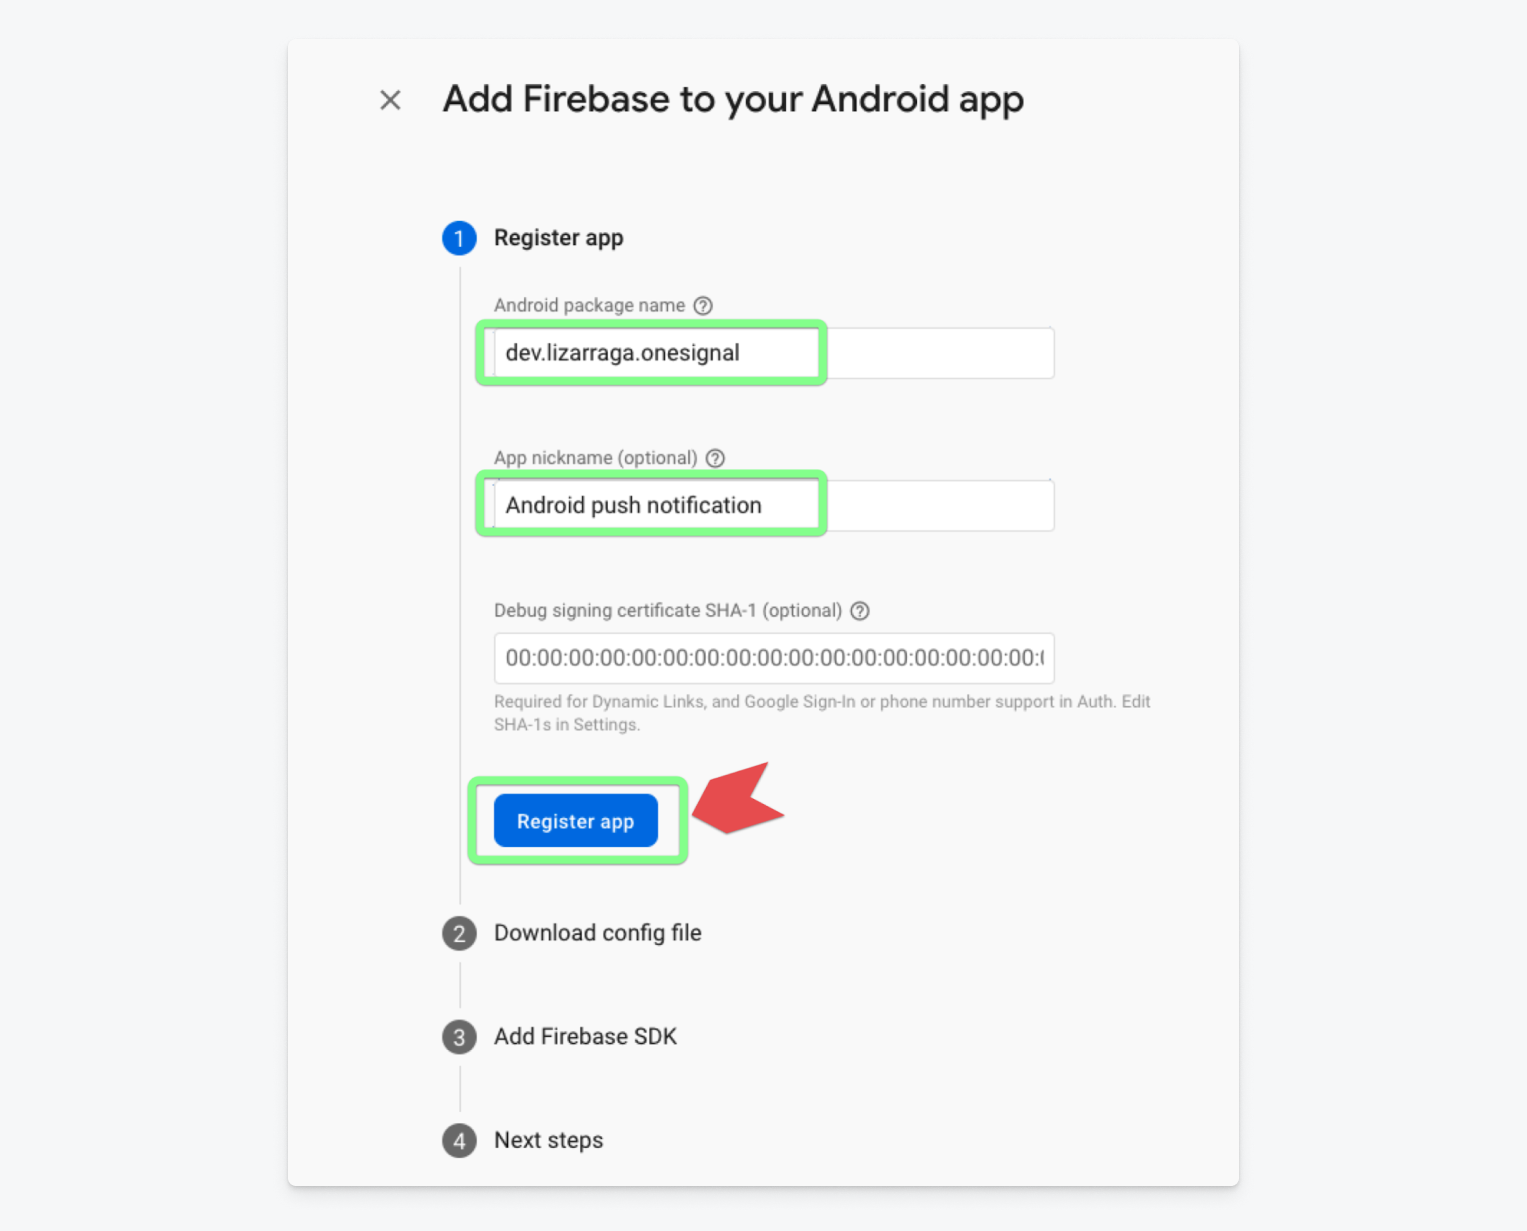
Copy the value of the package tag and paste it into the requested field in Firebase entitled Android Package Name. Adding an App Nickname and Debug Signing certificate SHA-1 are both optional, however, if you plan to publish your application on the Play Store, you will need to generate an SHA-1 certificate in release mode. For now, you only need the Android Package Name and we click on the button entitled Register App.
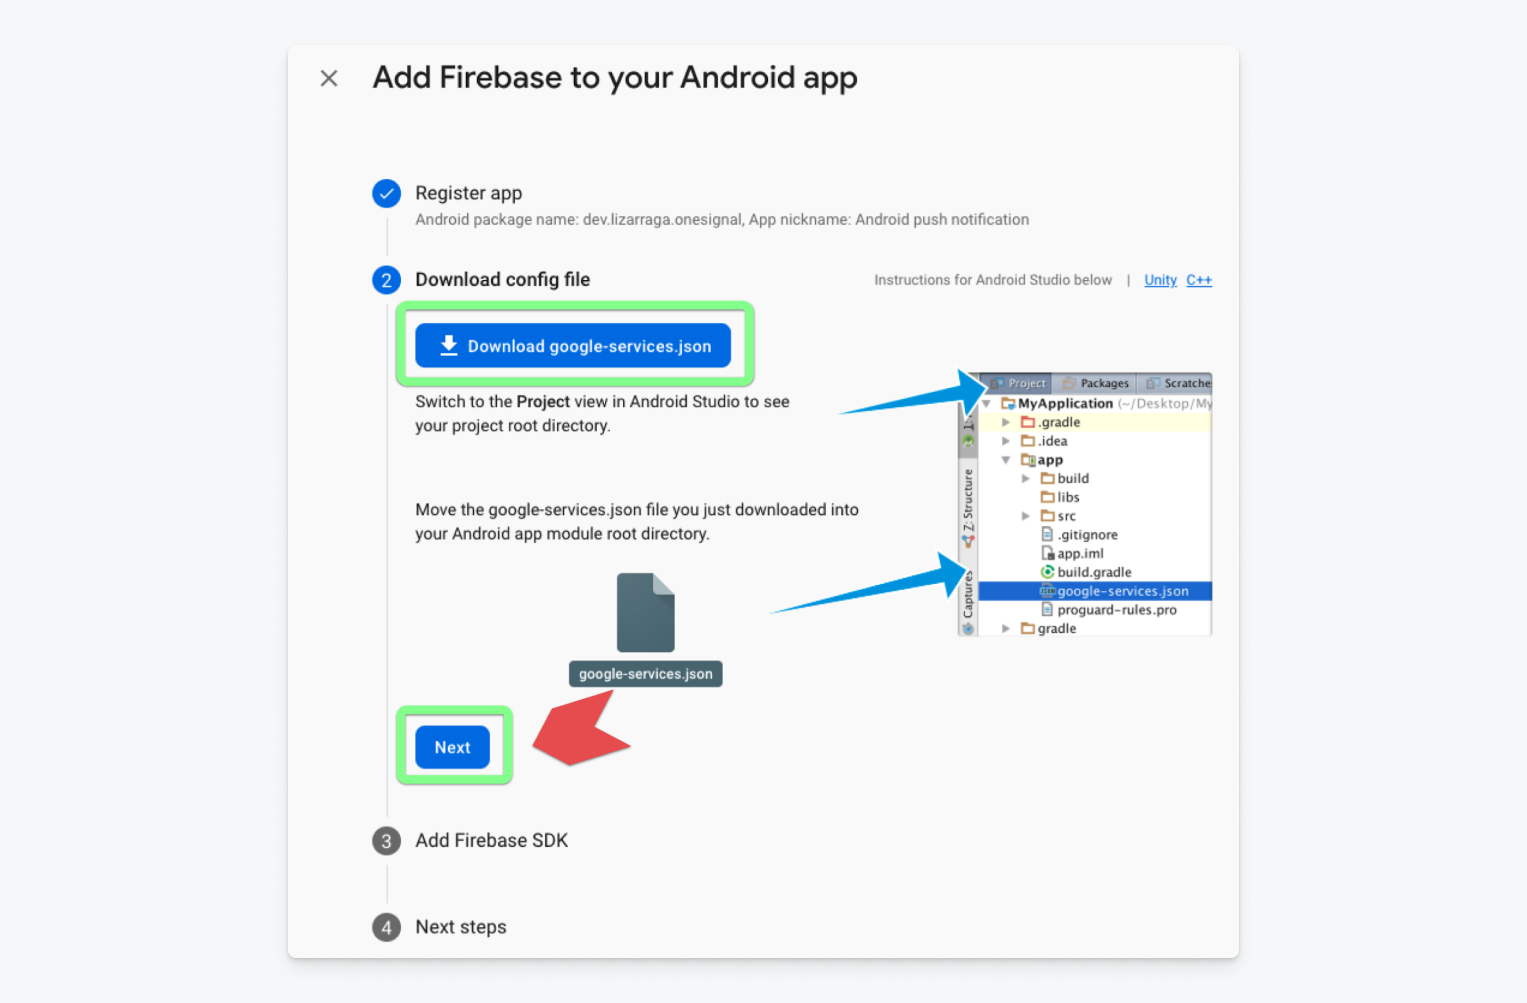
The previous action will create a configuration file which you must download and paste into the path mentioned in the same wizard. Download the file by clicking on the button entitled Download google-services.json and then open Android Studio.
Android Configuration
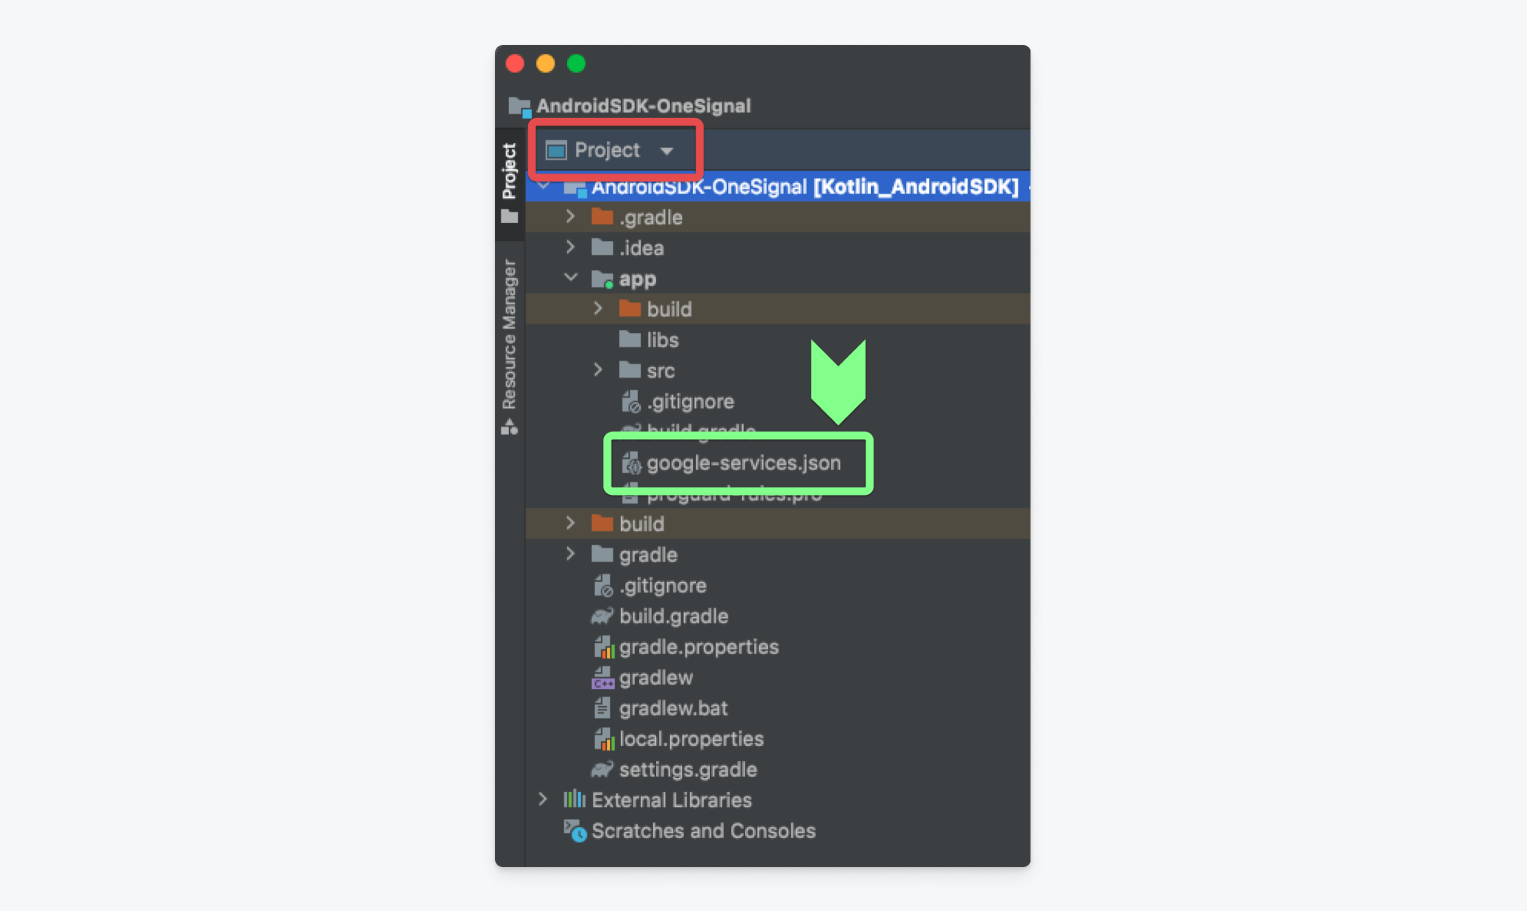
In our Android Studio project, place the previously downloaded google-services.json file into the path indicated by the wizard. To do this you'll need to change the display mode of the project path. Click on the Android option and select Project from the drop-down menu.
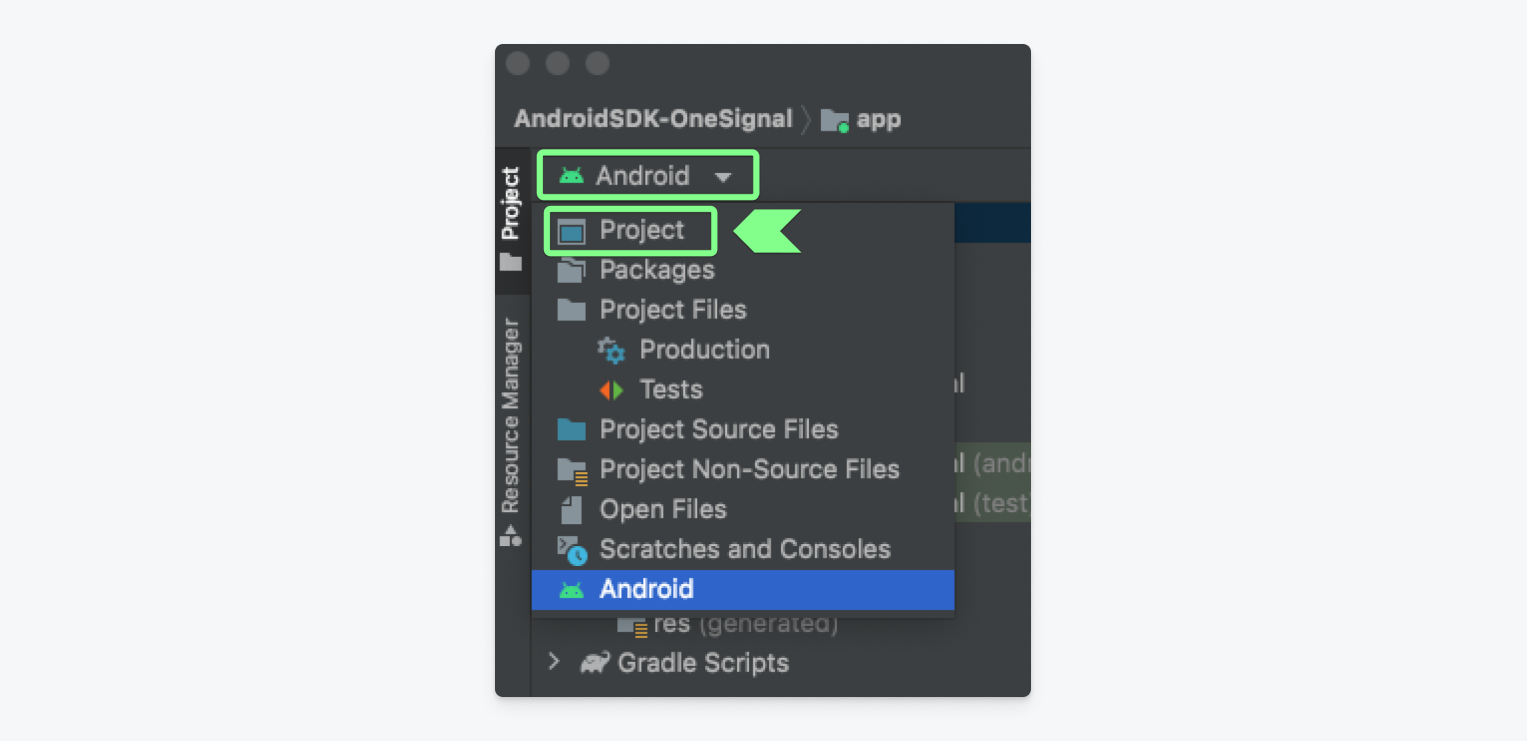
Copy the google-services.json file into the root of the app folder. Once copied, change the view mode back to Android.
After placing the downloaded file into the correct location, return to Firebase configuration wizard, then click next to add the Firebase SDK to your application as indicated by the wizard.
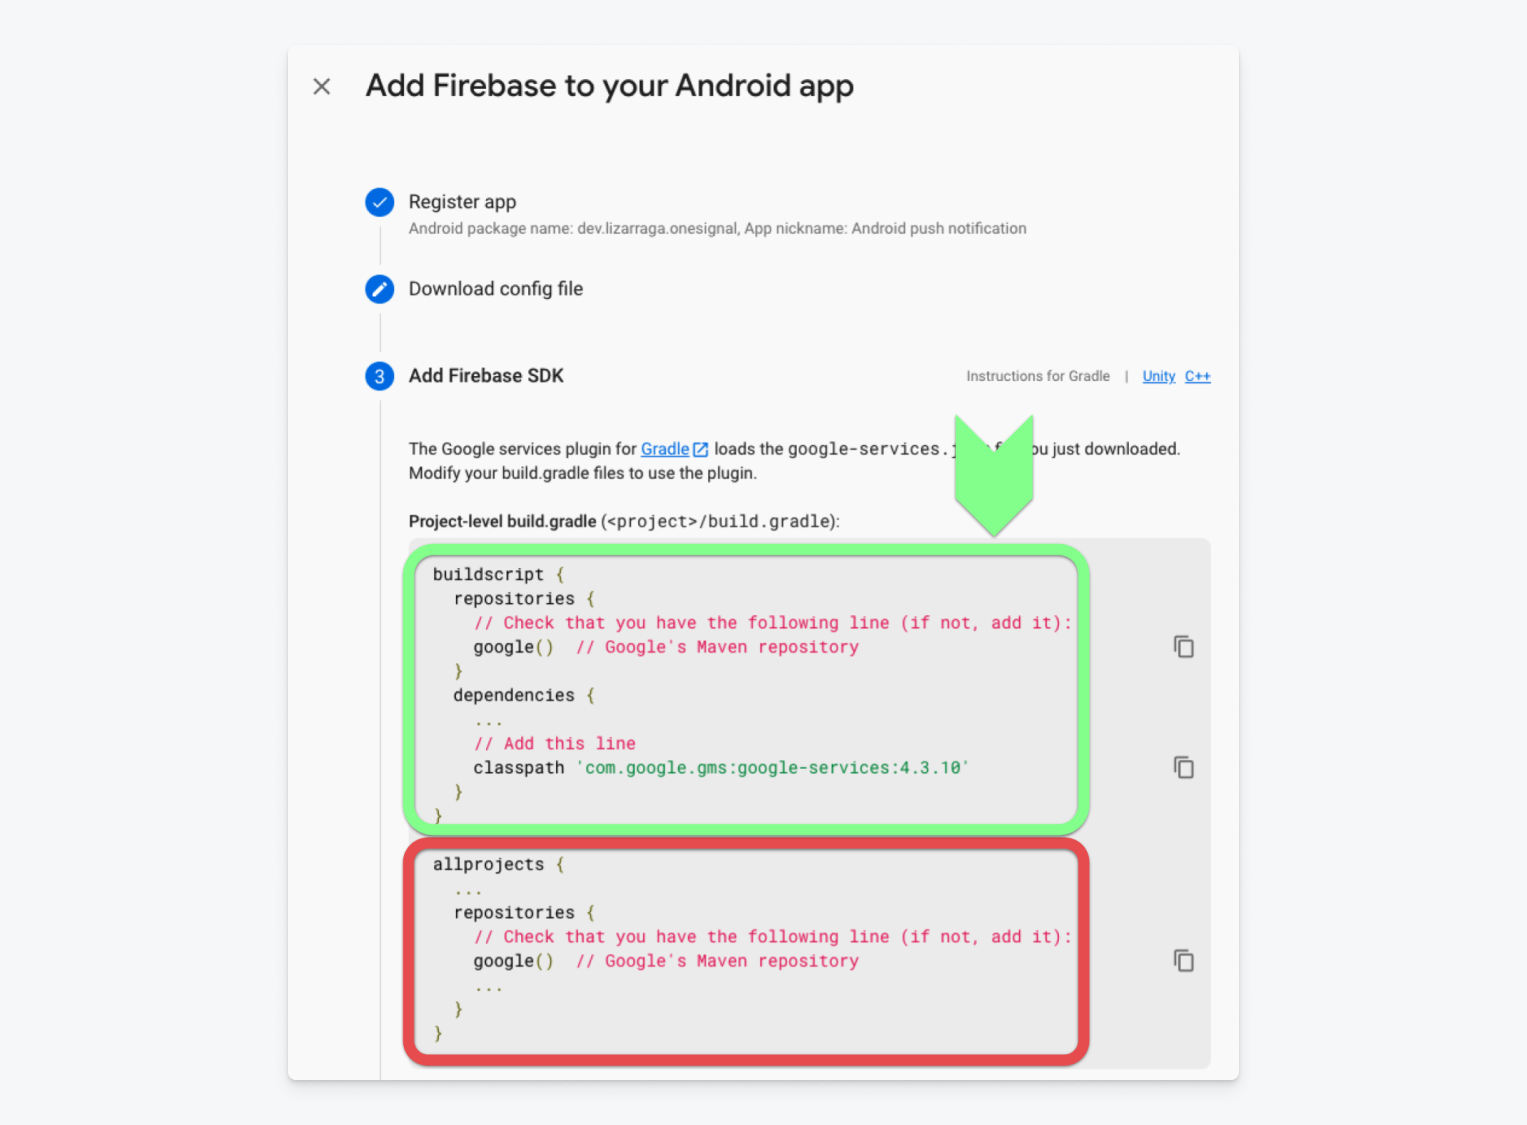
In new versions of Android Studio (Artic Fox and higher), it’s no longer necessary to add the allprojects { } section. In this case, you can use the Chipmunk version of Android Studio (updated until April 28, 2022) together with version 7.3.3 from Gradle. The buildscript of build.gradle (project) would look like this:
buildscript {
    dependencies {
    	classpath 'com.google.gms:google-services:4.3.10'
    }
    repositories {
    	google()
    }
}
Next, go to the build.gradle (app) file and add the plugin:
id 'com.google.gms.google-services'Finally, add the necessary dependencies to connect to Firebase. If you use Java there is a slight change in the implementation code, so select the approriate method below.
Java
implementation platform('com.google.firebase:firebase-bom:30.0.0')
implementation 'com.google.firebase:firebase-analytics'
Kotlin
implementation platform('com.google.firebase:firebase-bom:30.0.0')
implementation 'com.google.firebase:firebase-analytics-ktx'
Once the dependencies have been added, click on the Sync Now button and wait for it to download the dependencies and index with the project.
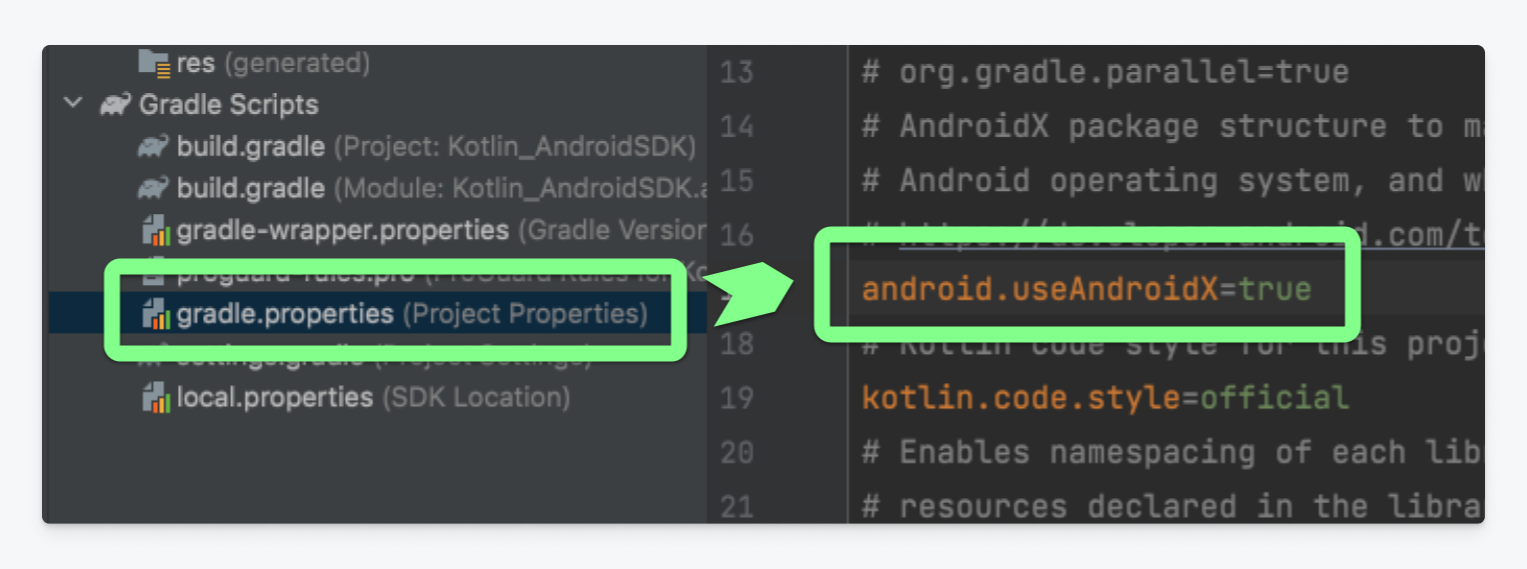
Verify AndroidX
Before you proceed, it's important to verify that AndroidX is enabled. If you are using an updated version of Android Studio, it's very likely that this option is already enabled. However, if it isn't, go to the gradle.properties file and add the statement android.useAndroidX=true.
Once this statement has been verified, click Run app to run the application verifying that there is a physical device or emulator where the application is displayed.
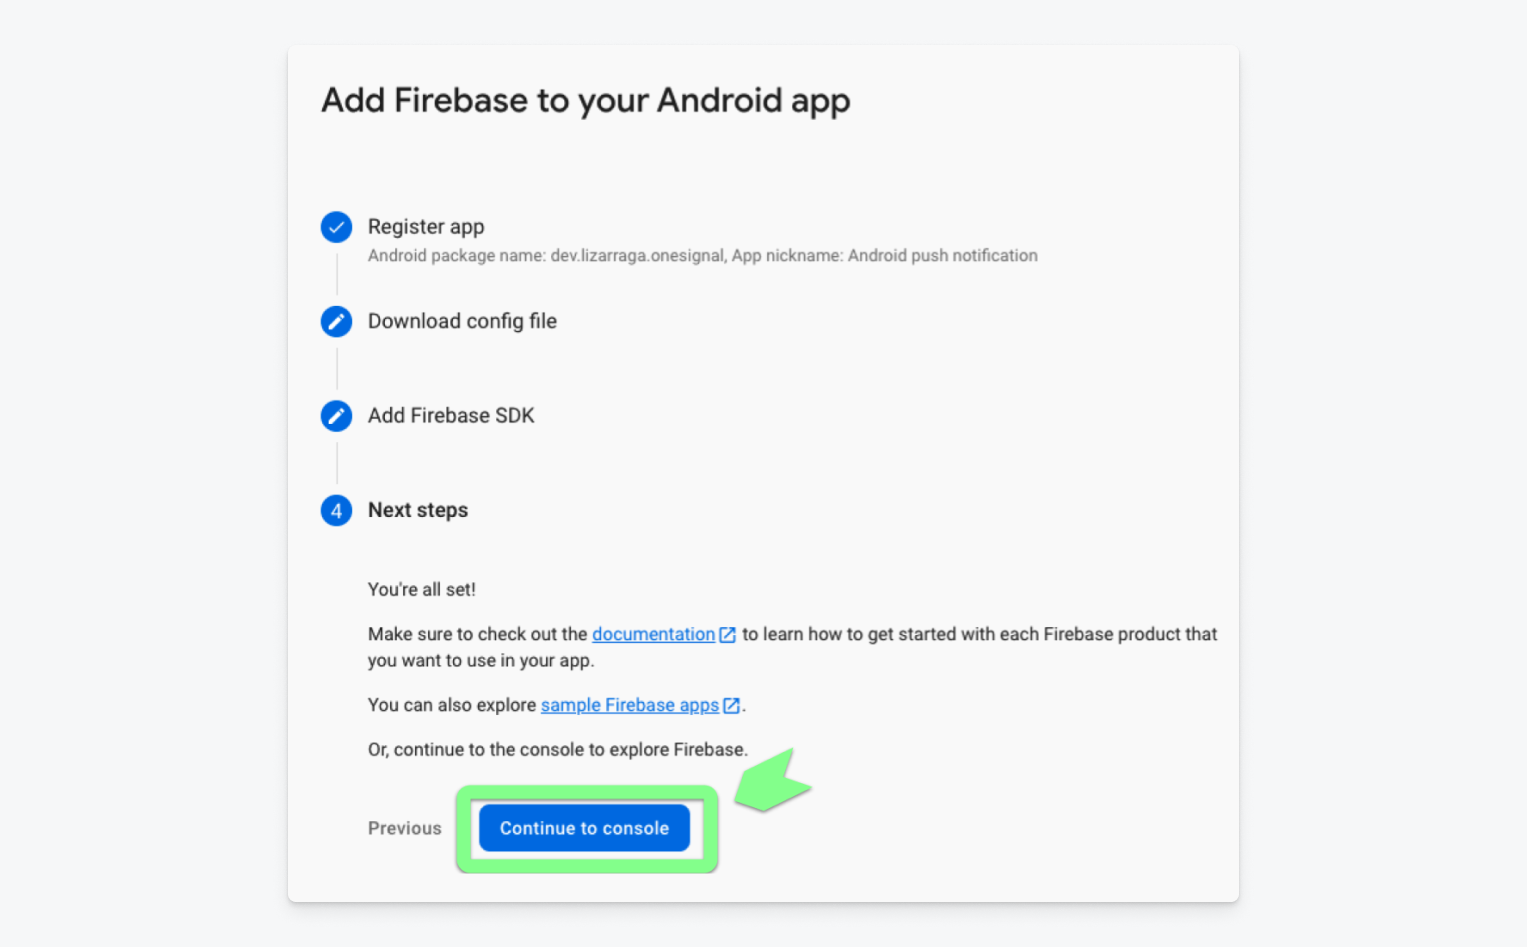
Once the app has run, go back to the Firebase wizard to click Next to complete the Firebase setup and then click Continue to console.
OneSignal Configuration
Next, you'll need to set up your OneSignal account and connect it with your project in Firebase. To begin, create a free OneSignal account or login to your existing account.
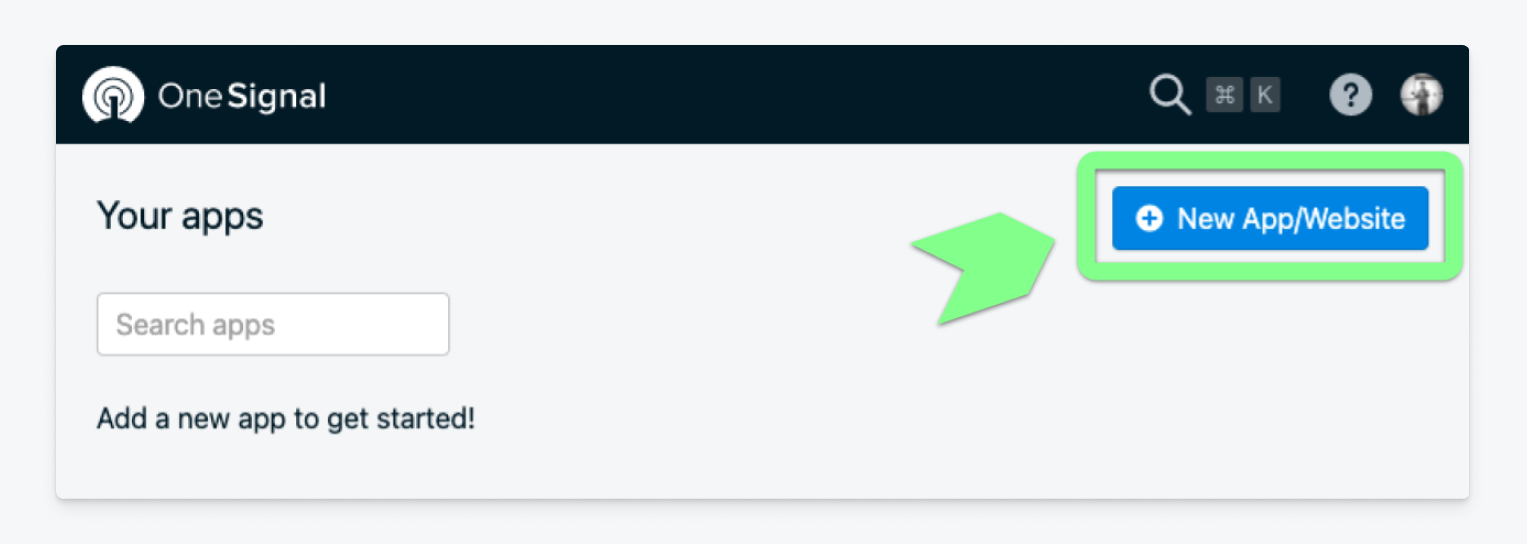
Once you've created an account, you'll be prompted to set up a new application or website. Click the blue New App/Website button in the top right corner of the screen.
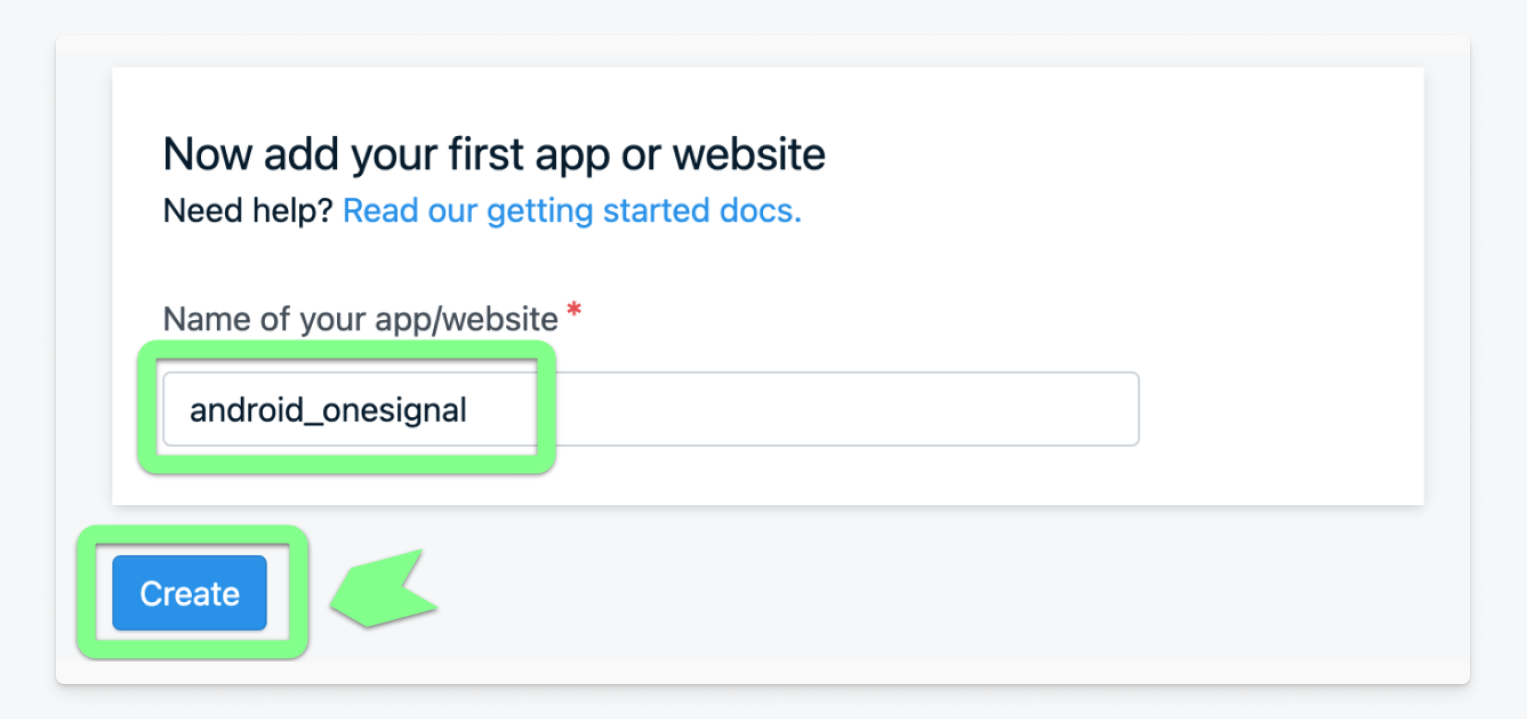
Name your application and then click Create.
To configure your platform, select Google Android (FCM) from the menu options and then click Next: Configure Your Platform.

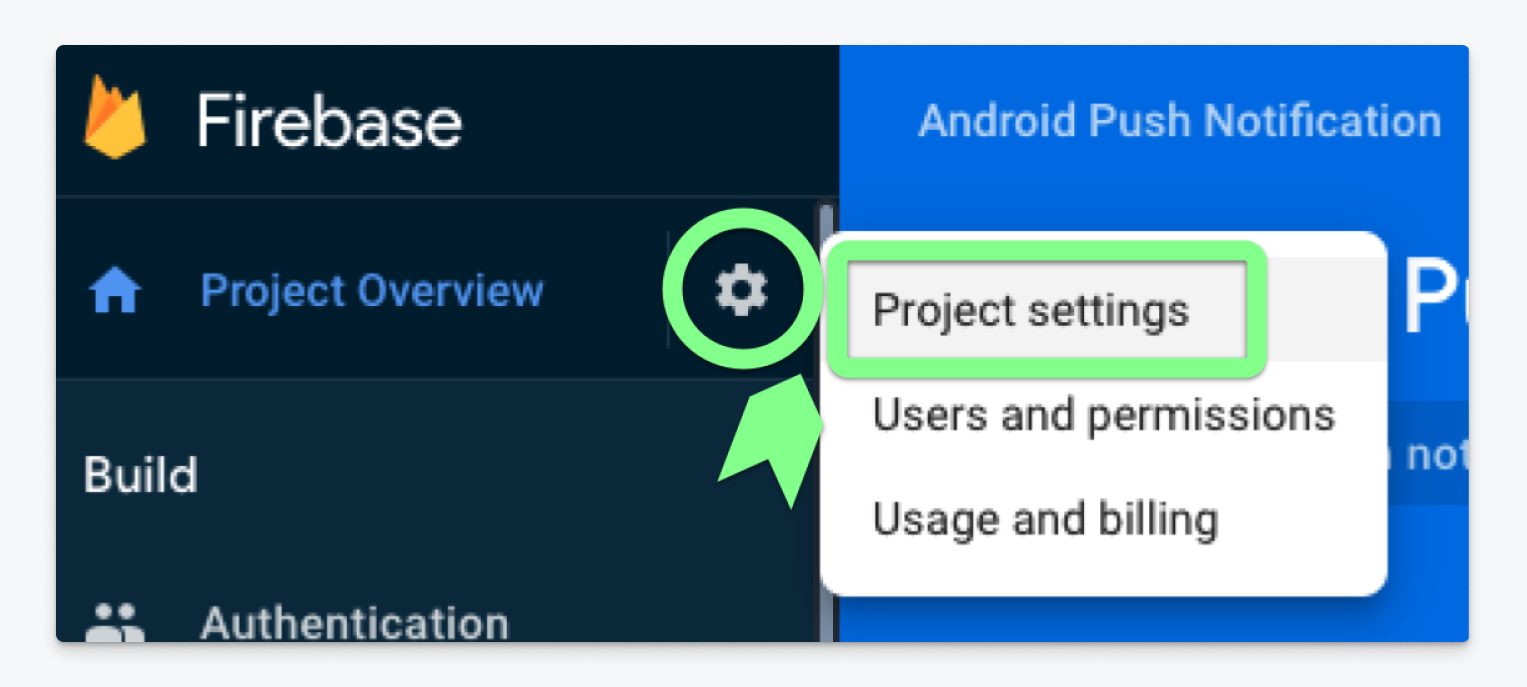
To complete the next step, you'll need to navigate back to your Firebase project, select the settings icon, and click project settings.
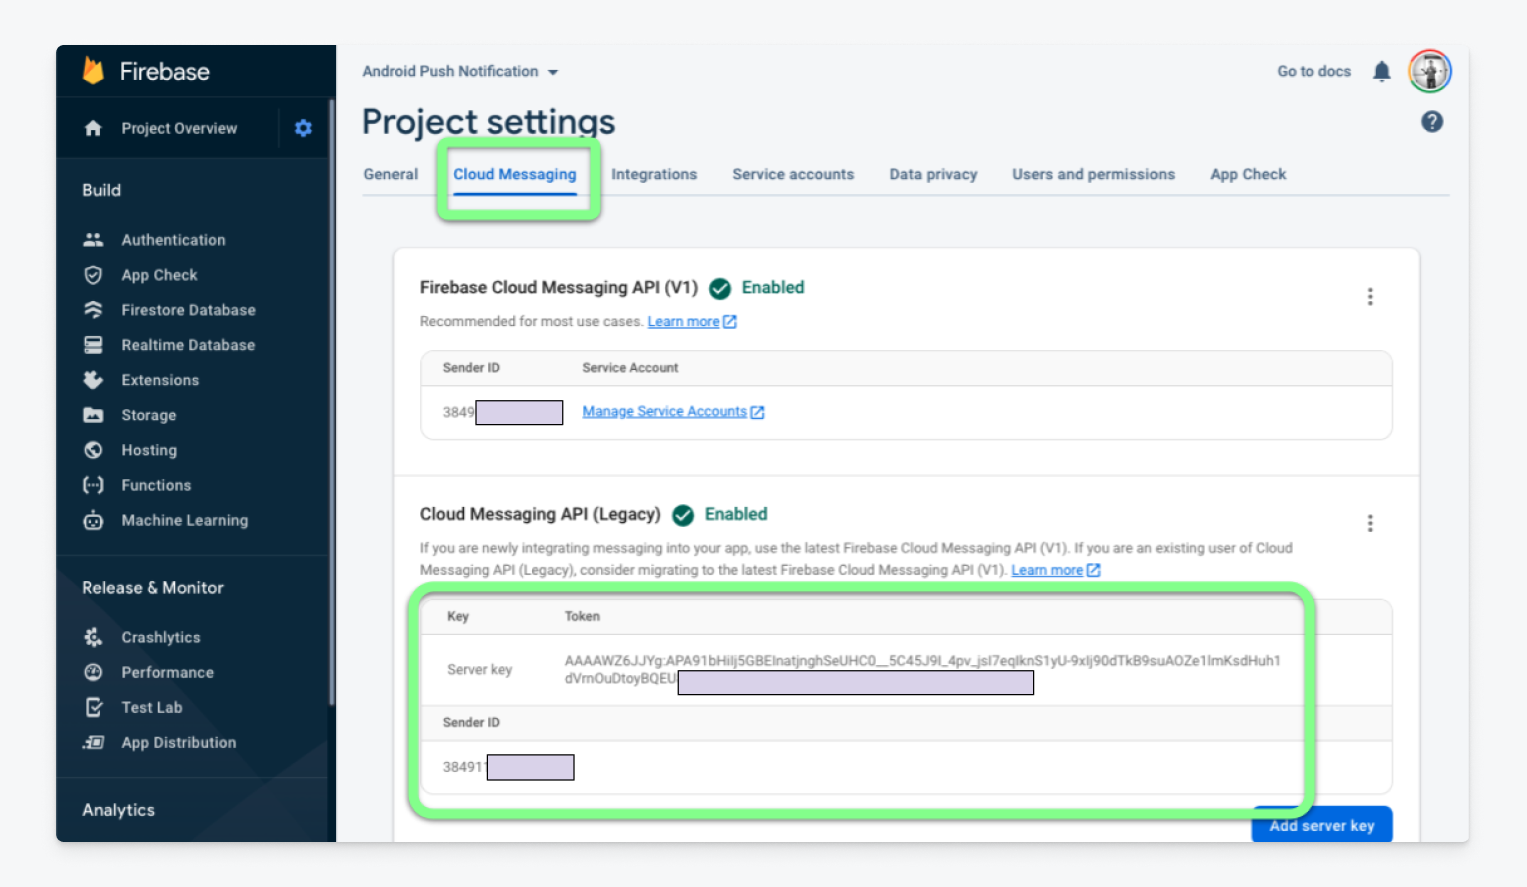
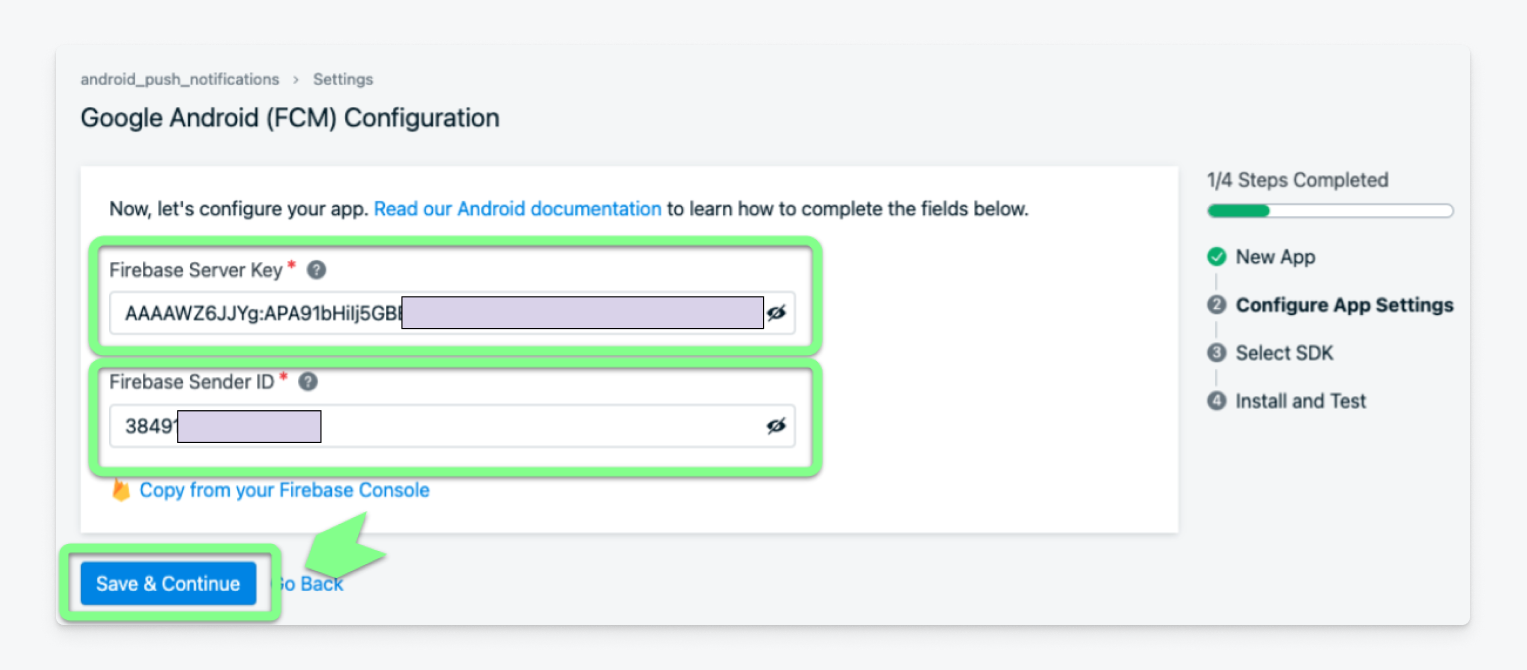
In the Project Settings window, select the Cloud Messaging tab and scroll down on the page to the section entitled Cloud Messaging API. Locate your Server Key and Sender ID and copy both values to use in the next step.
Back in your OneSignal dashboard, paste your two Firebase Cloud Messaging API values, and then click the blue Save & Continue button.
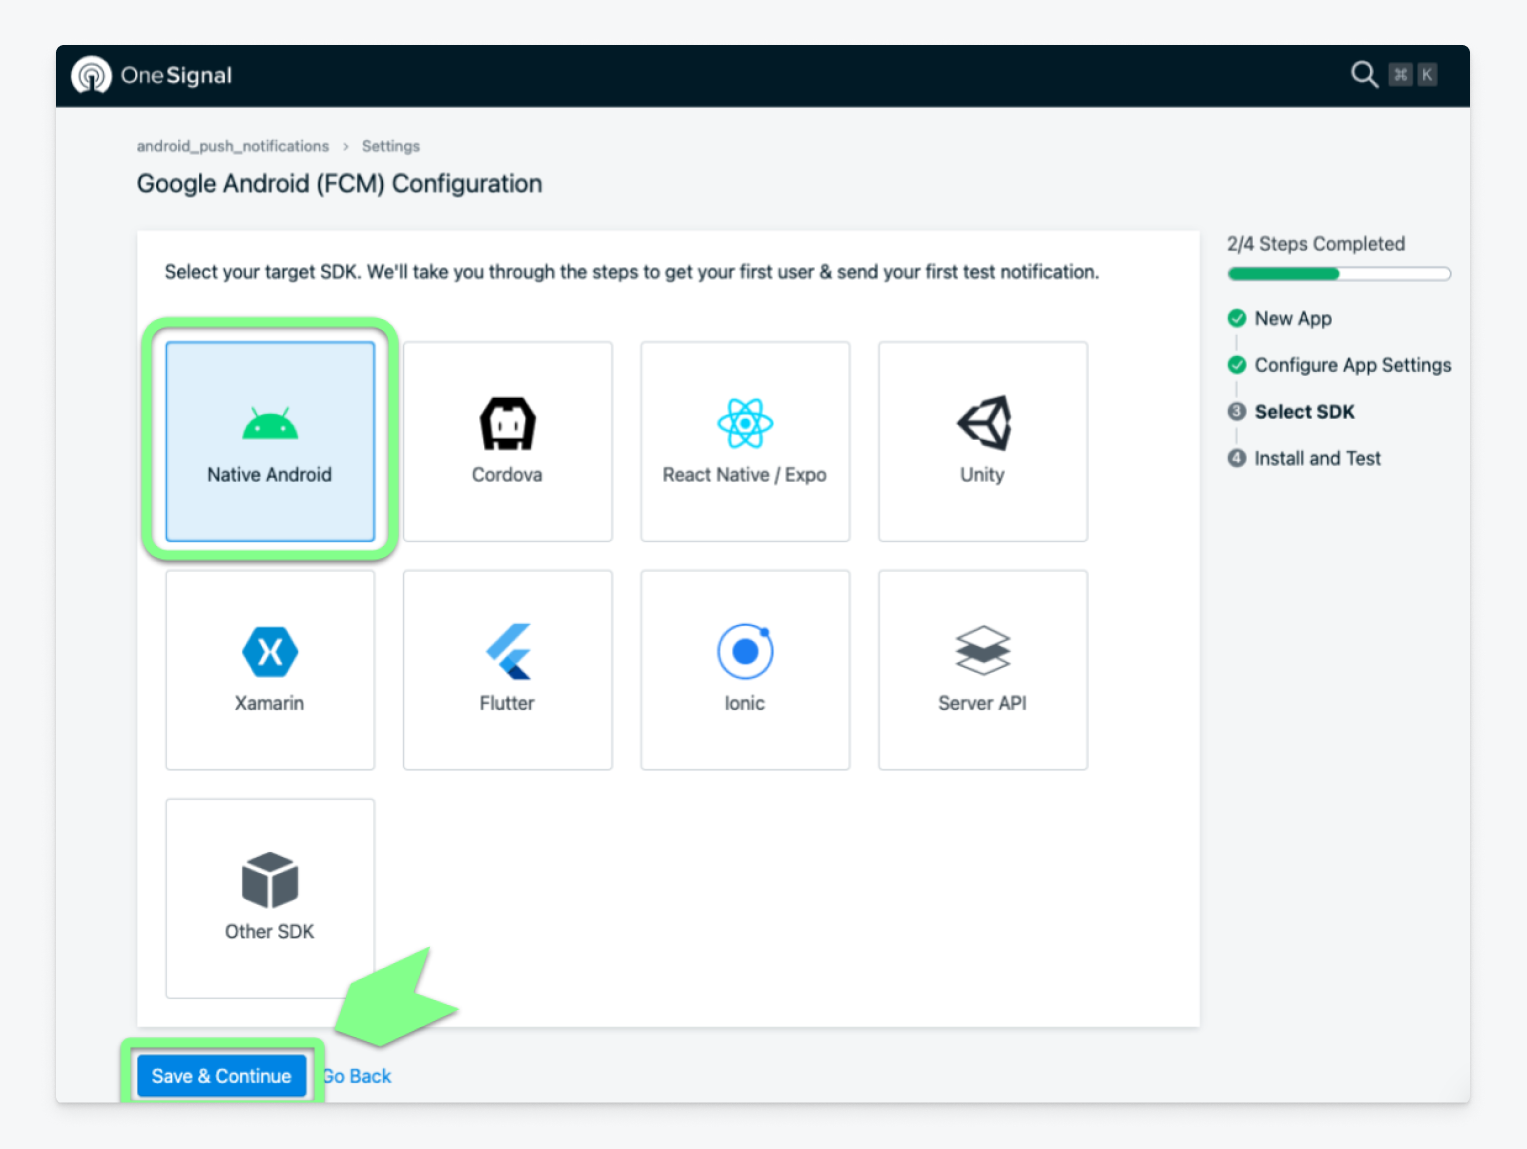
Next, you'll be prompted to select your target SDK. Select Native Android and then click the Save & Continue button to proceed to the next step.
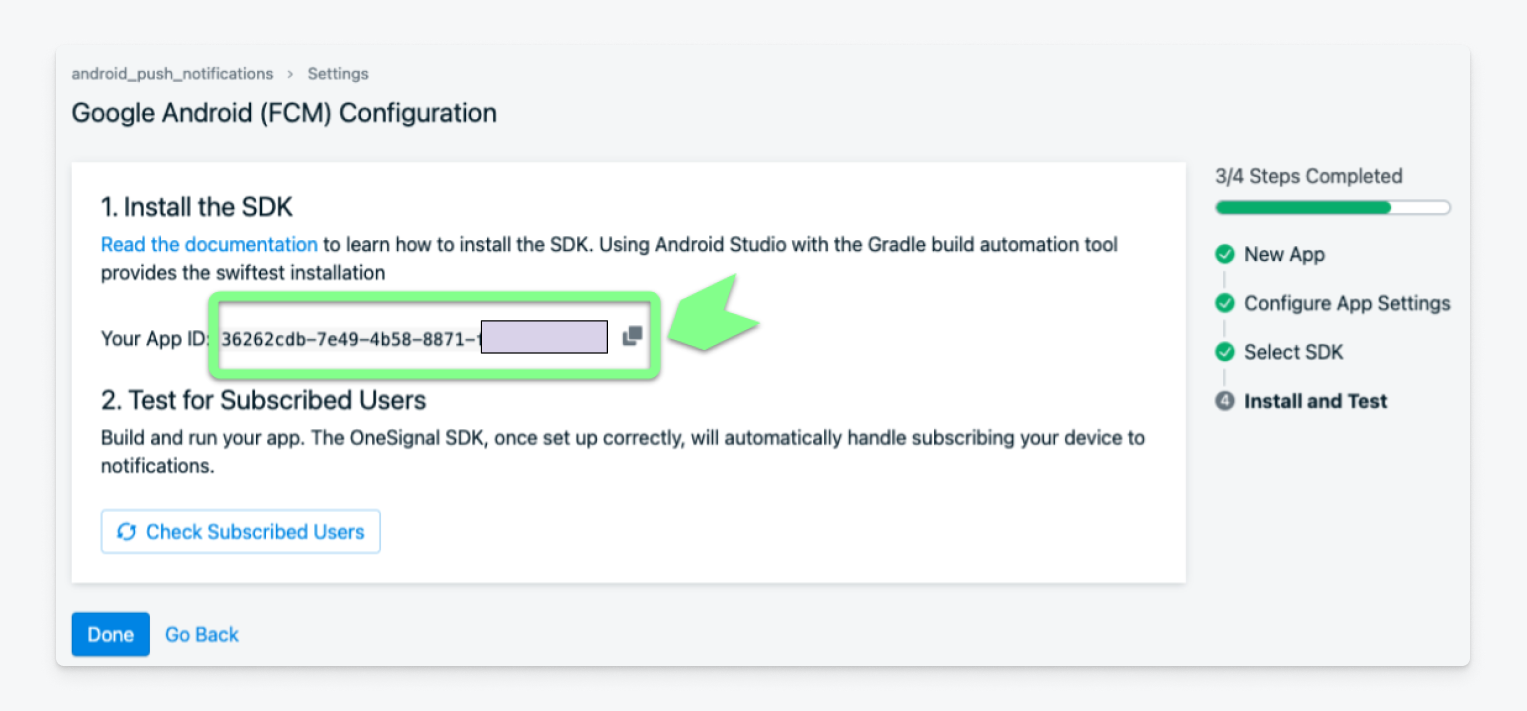
On the next screen, you should see your App ID which has been generated by OneSignal. Copy this value but don't click the done button yet!
Adding the OneSignal SDK to Your Android Project
Once you've finished configuring Firebase and OneSignal, you'll need to add the SDK to your Android application so that you can seamlessly send push notifications from OneSignal and leverage a variety of additional dashboard features to automate and personalize your notifications at scale.
Modify build.gradle (project)
First, open the build.gradle (project) file to add the following two statements:
Inside dependencies, add:
classpath 'gradle.plugin.com.onesignal:onesignal-gradle-plugin:0.14.0'In buildscript { repositories { } }, add:
mavenCentral()Modify build.gradle (app)
Next, navigate to the build.gradle (app) file to add the following dependency:
implementation 'com.onesignal:OneSignal:[4.0.0, 4.99.99]'Once that's completed, click the Sync now option located at the top right of any build.gradle file.
Create Application Class
Create a new class in the main application package as shown in the image below.
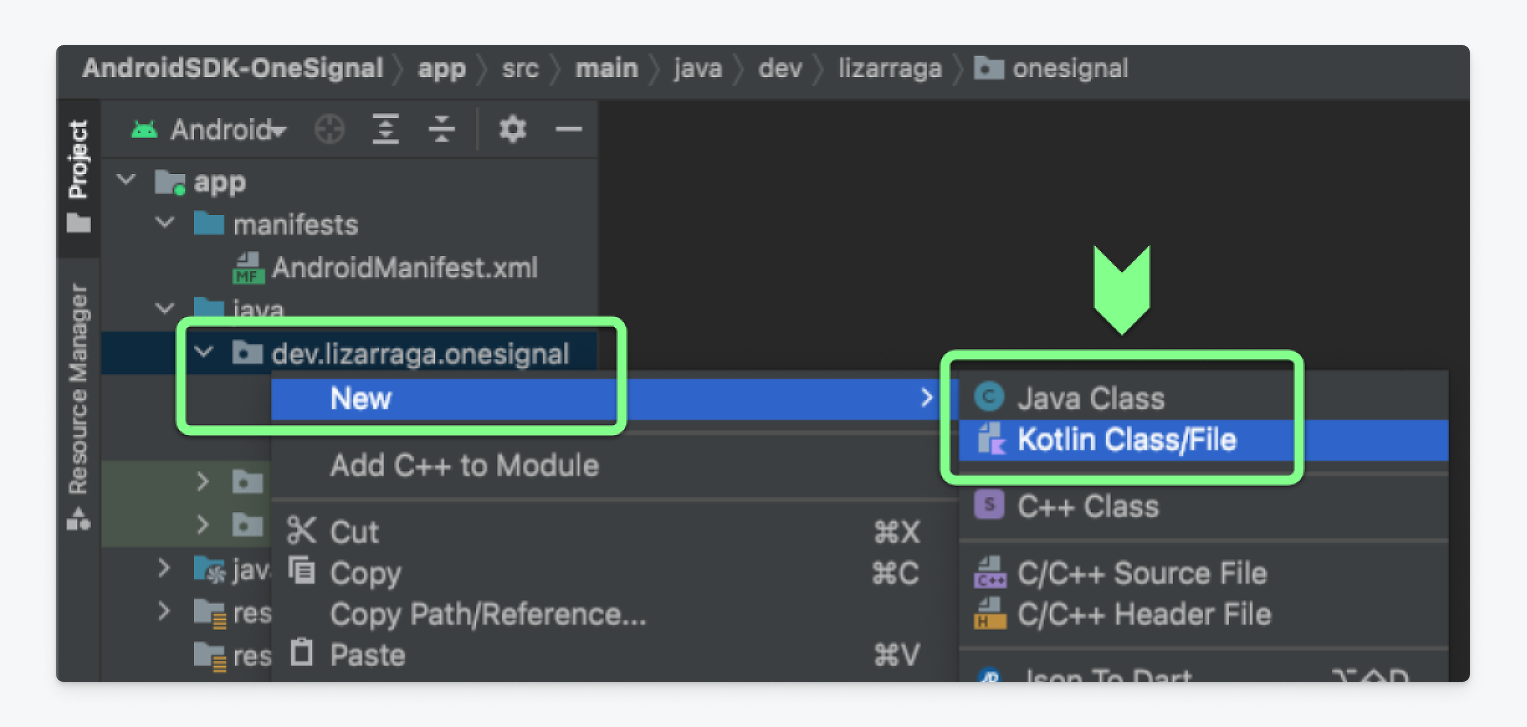
For this demo, I've named the application OneSignalApplication. I created the class in Kotlin, but if you'd like you can create it in Java class mode).
Once created, add the inheritance of the Application class. The Application class makes everything declared within it remain instantiated throughout the application's life cycle. You will overload the onCreate() method and it will look like this:
Java
import android.app.Application;
public class ApplicationClass extends Application {
@Override
    public void onCreate() {
    	super.onCreate();
	}
}
Kotlin
import android.app.Application;
    class OneSignalApplication: Application() {
        override fun onCreate() {
        super.onCreate()
    }
}
Now it's time to initialize the OneSignal SDK. Earlier in this tutorial, you generated an App ID in your OneSignal project. You will need to add this ID as a global variable inside the OneSignalApplication class.
Java
private static final String ONESIGNAL_APP_ID = "YOUR_APP_ID_HERE";Kotlin
const val ONESIGNAL_APP_ID = "YOUR_APP_ID_HERE"Next, inside the onCreate() function, you'll need to add a few necessary lines of code.
Add the lines below in order to solve problems in debugging. Delete this line if you are going to publish your application because it is only used for debug mode.
OneSignal.setLogLevel(OneSignal.LOG_LEVEL.VERBOSE, OneSignal.LOG_LEVEL.NONE)In order to initialize the OneSignal services with the application context and your application, add the following two lines.
OneSignal.initWithContext(this)
OneSignal.setAppId(ONESIGNAL_APP_ID)
In Java, just add ; at the end of each line.
Register application class in AndroidManifest.xml
To finalize our application, add the declaration of the OneSignal Application class inside the AndroidManifest.xml file.
...
    <application
        android:name=".OneSignalApplication"
        ...
    </application>
...
Finally, run the application!
The source code for the Kotlin application is in the GitHub repository.
Send Your First Push Notification
Now that everything is configured, it's time to send your first notification! Navigate to the OneSignal dashboard. Select Check Subscribed Users.
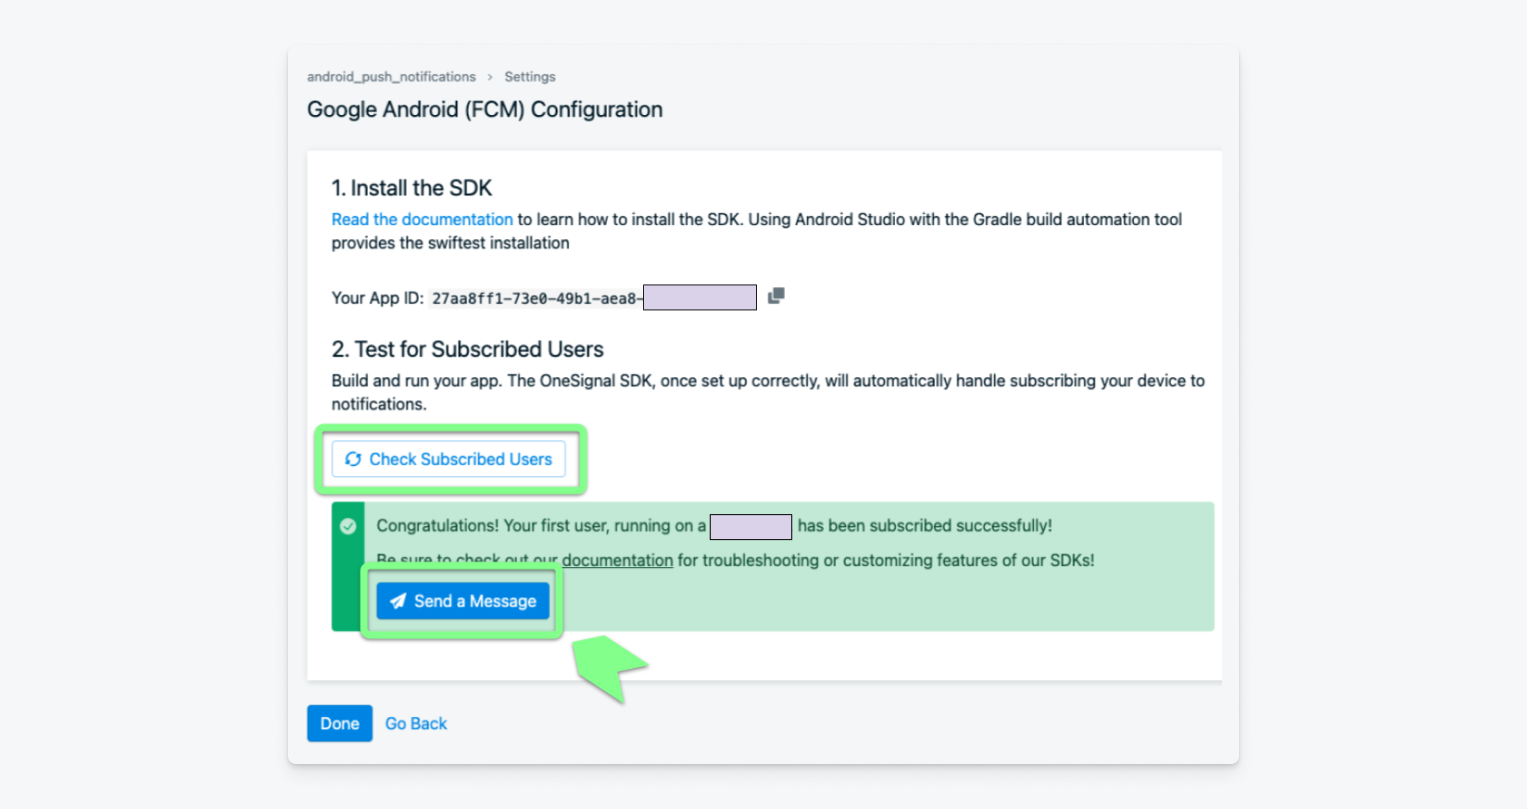
If everything went well, you should see a green pop-up message indicating that the connection was successful. You can proceed to create your first notification by clicking on the blue Send a Message button.
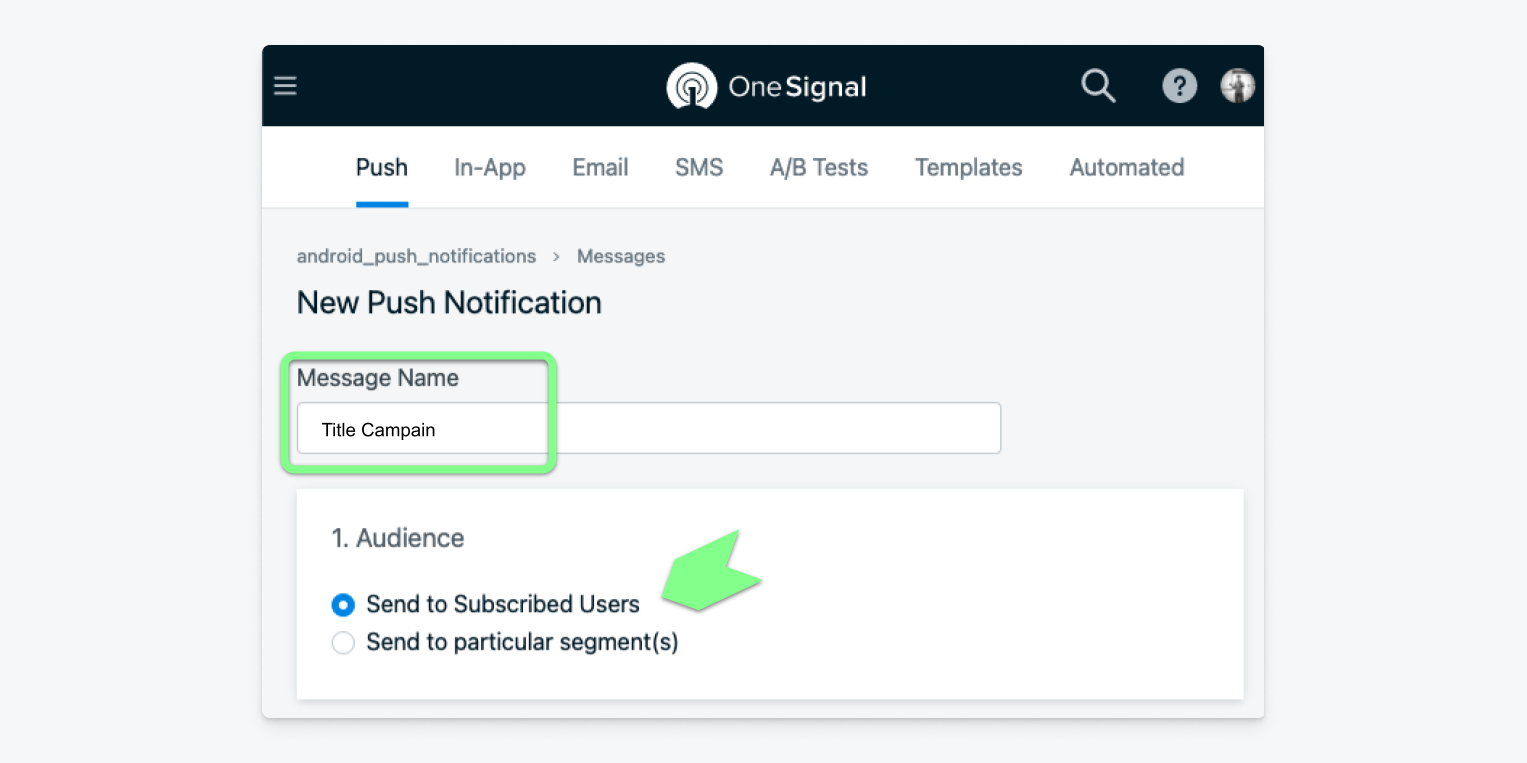
On the next screen, name your message and select the audience you'd like to send it to. For this initial test, select subscribed users.
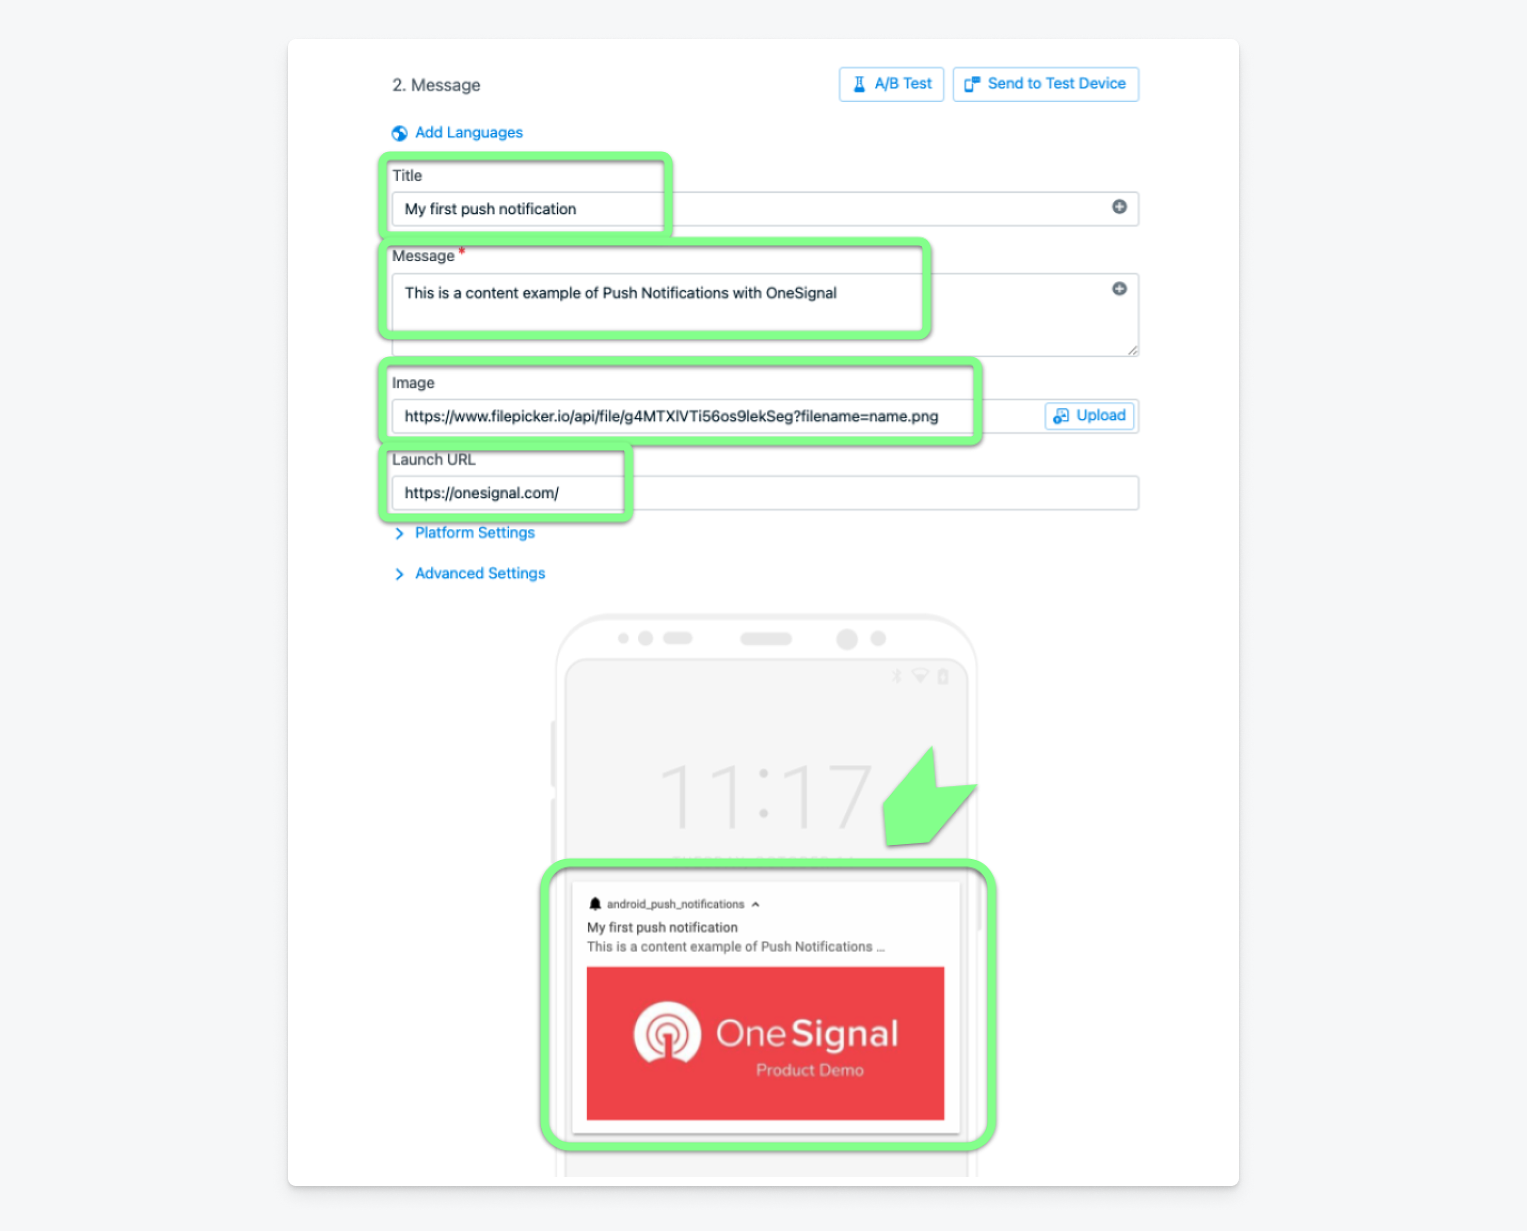
In the next section, you customize the notification to your liking and view a preview of how it will appear on your target device. For demo purposes, I added a launch URL to be included in the message as well as an image.
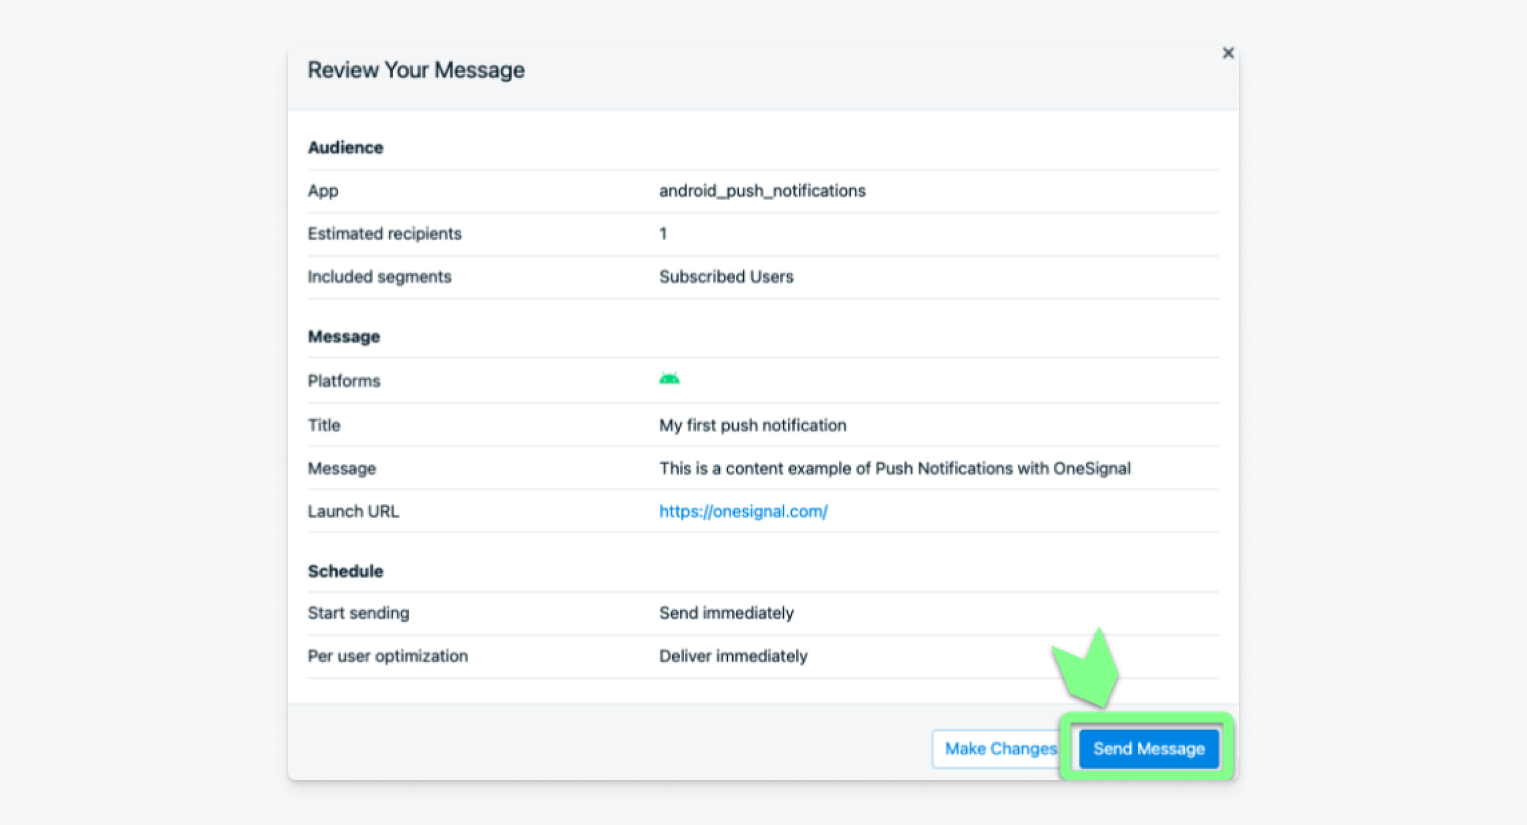
In the last section, select Immediately and Send to everyone at the same time. These options will make it easy to test out your first notification. Finally, click the blue Review and Send button at the bottom of the screen.
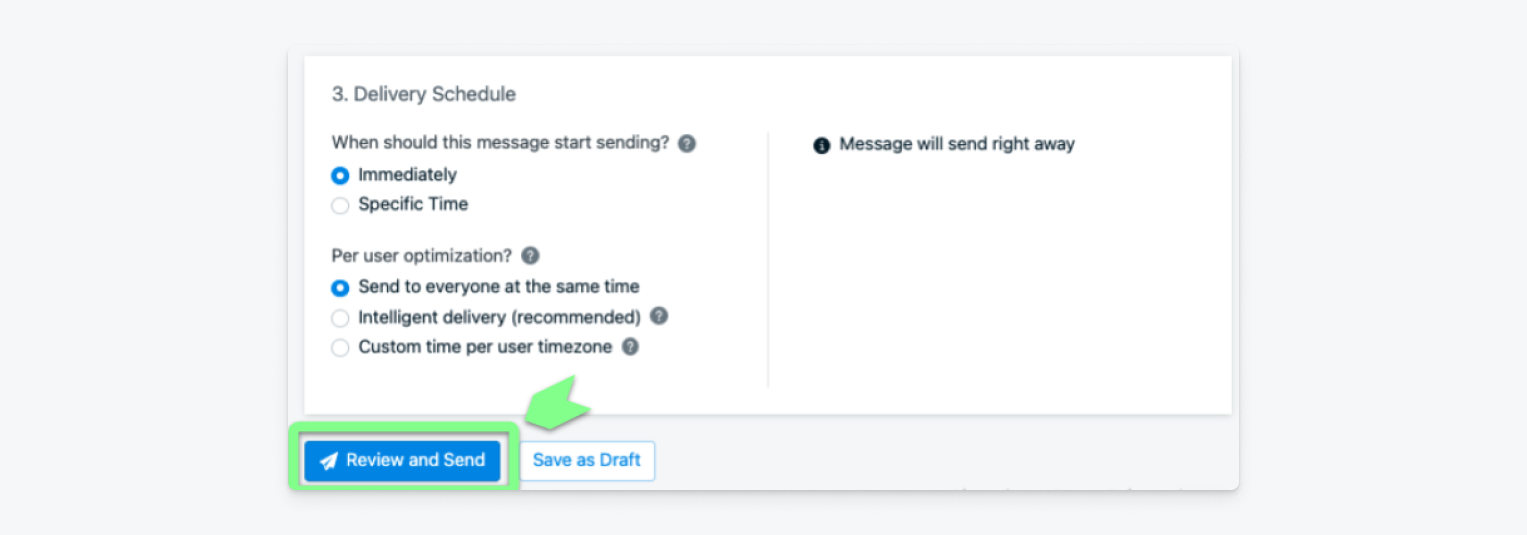
If your message looks good, click Send Message to send the notification to your current subscribed users.
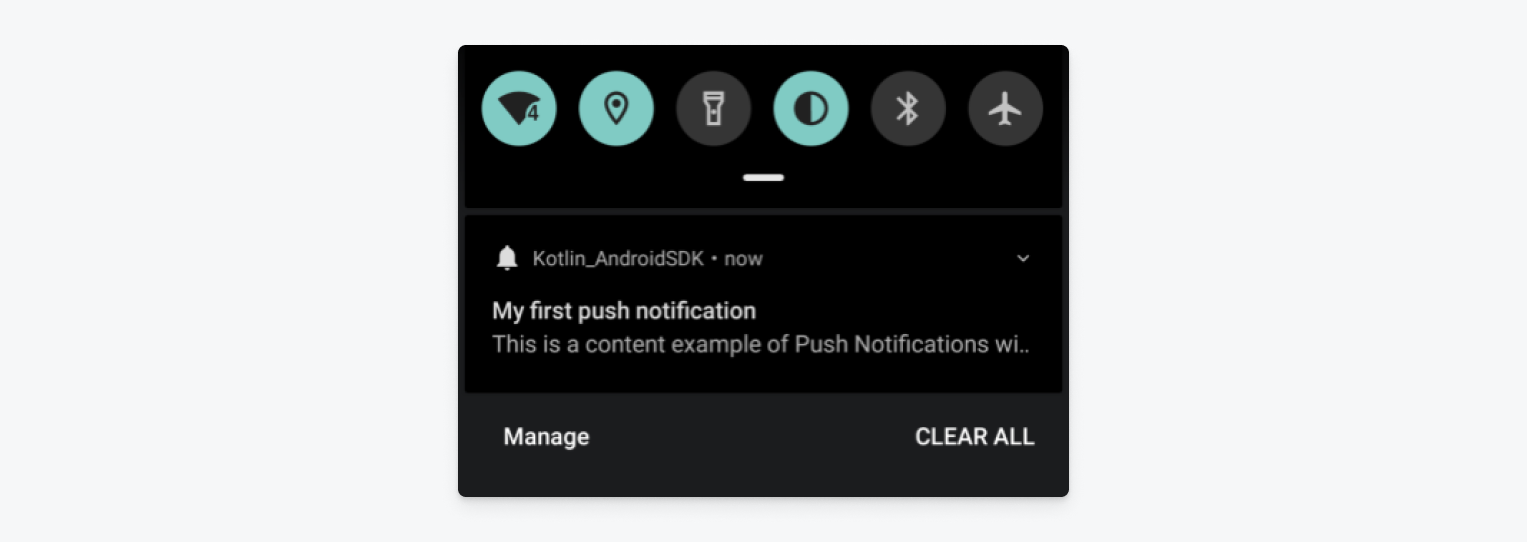
On your Android phone where you execute the application, you should see your notification preview.
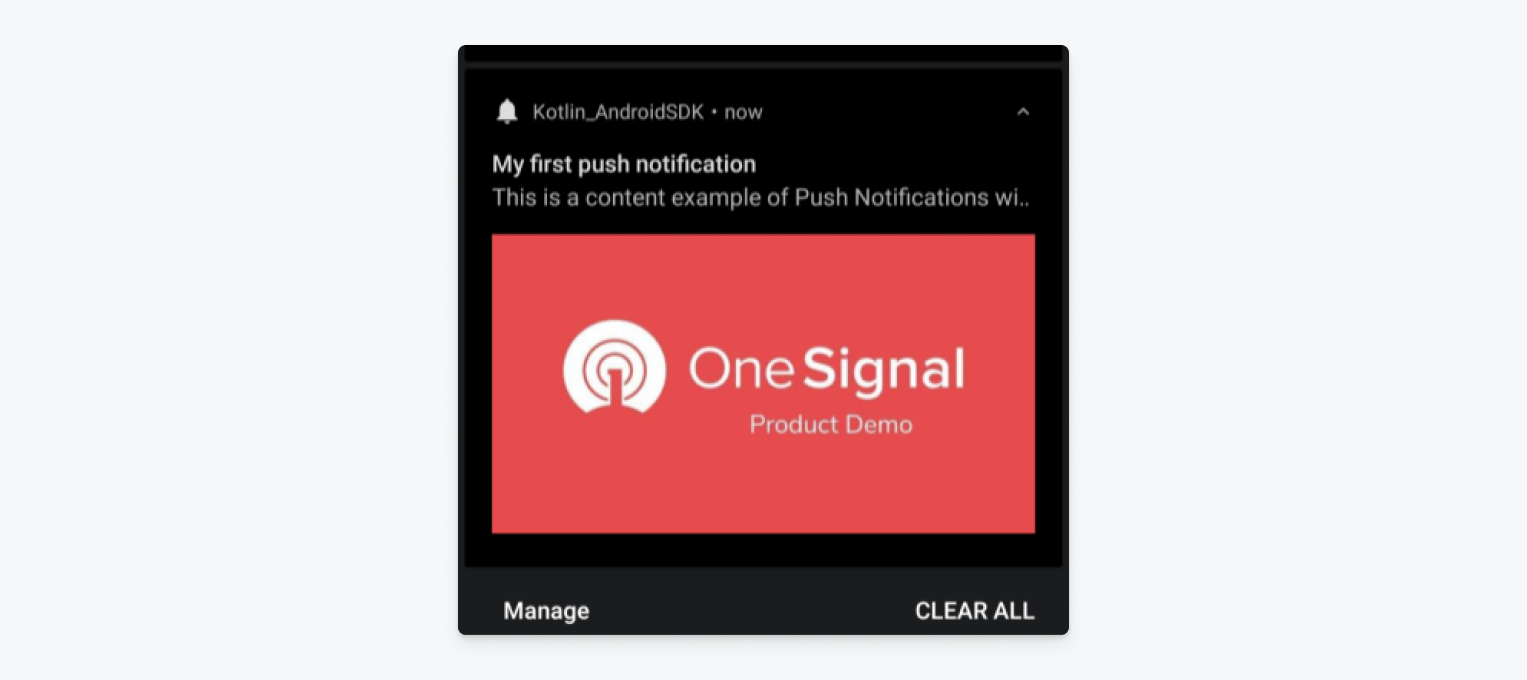
When you click on the notification, you should also see your chosen image and destination URL.
The source code for the Kotlin application is in the OneSingal Android Push Sample.
Share Your Feedback
We'd love to know what you think and answer any additional questions you have. To connect with us, create an issue on GitHub or ping us on the OneSignalDevs Discord server to share your experience. We appreciate any insight you can share to help us better serve Android users!
To stay in the loop with the latest product updates and innovations, follow the OneSignal Developers Twitter. For additional support and dev inspiration, tap into our global developer community.
Connect with our Developer Community