Push notifications can help you engage and retain app users. This tutorial will show you how to integrate with OneSignal to leverage push notifications in your Android app.
OneSignal & The Push API
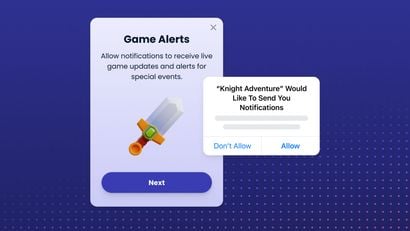
The browser's Push API gives web applications the ability to receive messages from a server whether or not the web app is in the foreground or currently loaded on a user agent. This lets you deliver asynchronous notifications and updates to users who opt-in, resulting in better engagement with timely new content.
This tutorial will cover how to integrate OneSignal push notifications into your app using our setup process for Android apps. Part one of this guide covers the OneSignal setup process. Part two of this guide covers the integration of OneSignal with Ionic + Capacitor (React) for your Android app.
Guide Overview
- Part 1: Set Up Your OneSignal Account
- Part 2: Push Notification Setup For Android In Ionic + Capacitor (React)
This tutorial requires some basic knowledge of React. I'm using the Ionic CLI to generate my project and NodeJS version 14.16.
Github Repository Resources
Ionic + Capacitor (React) OneSignal Setup
Part 1: Set Up Your OneSignal Account
To begin, log in to your OneSignal account or create a free account. Then, click on the blue button entitled New App/Website to configure your OneSignal account to fit your app or website.

Insert the name of your app or website. Select Google Android as your platform.
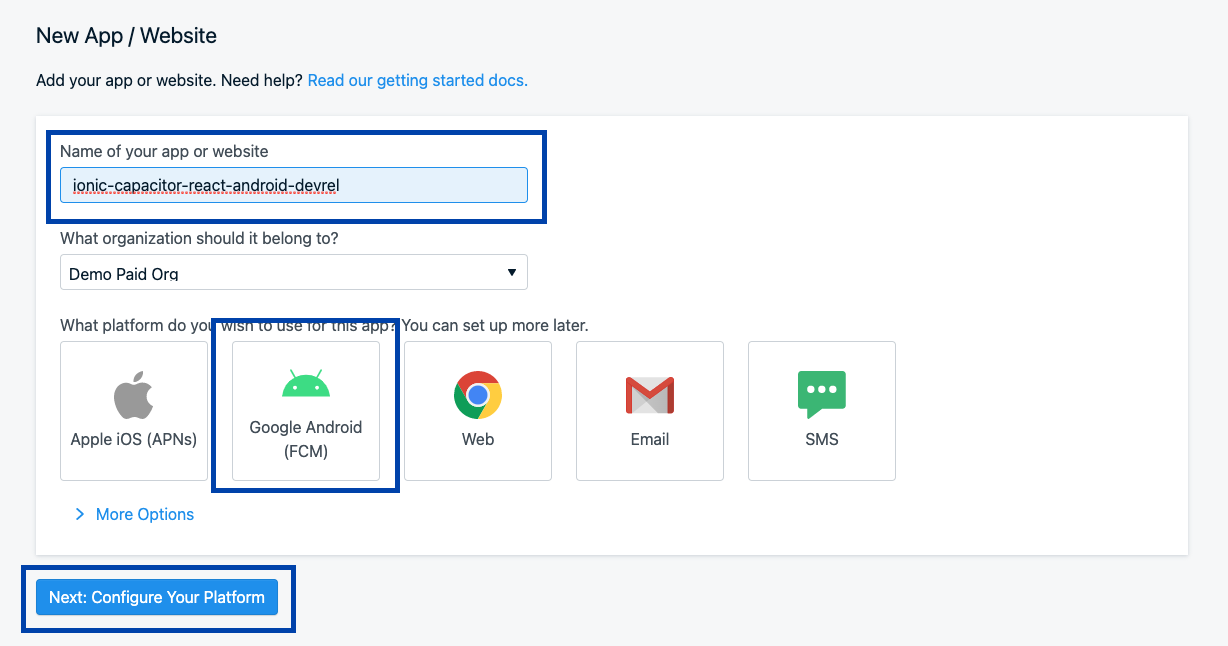
Click on the blue button entitled, Next: Configure Your Platform.
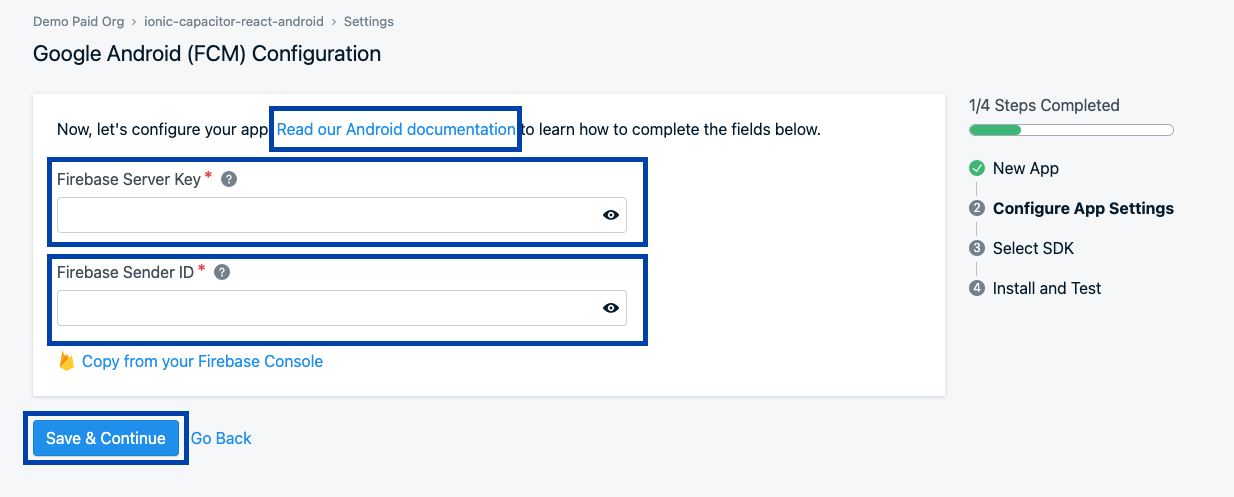
Google Android FCM Configuration
It’s time to configure your Android app using a Firebase Server key. All Android apps require this key and the server ID if you want to send push notifications. If you don’t have the Firebase Server Keys, take a look at our documentation to learn how to generate a Firebase server API key.
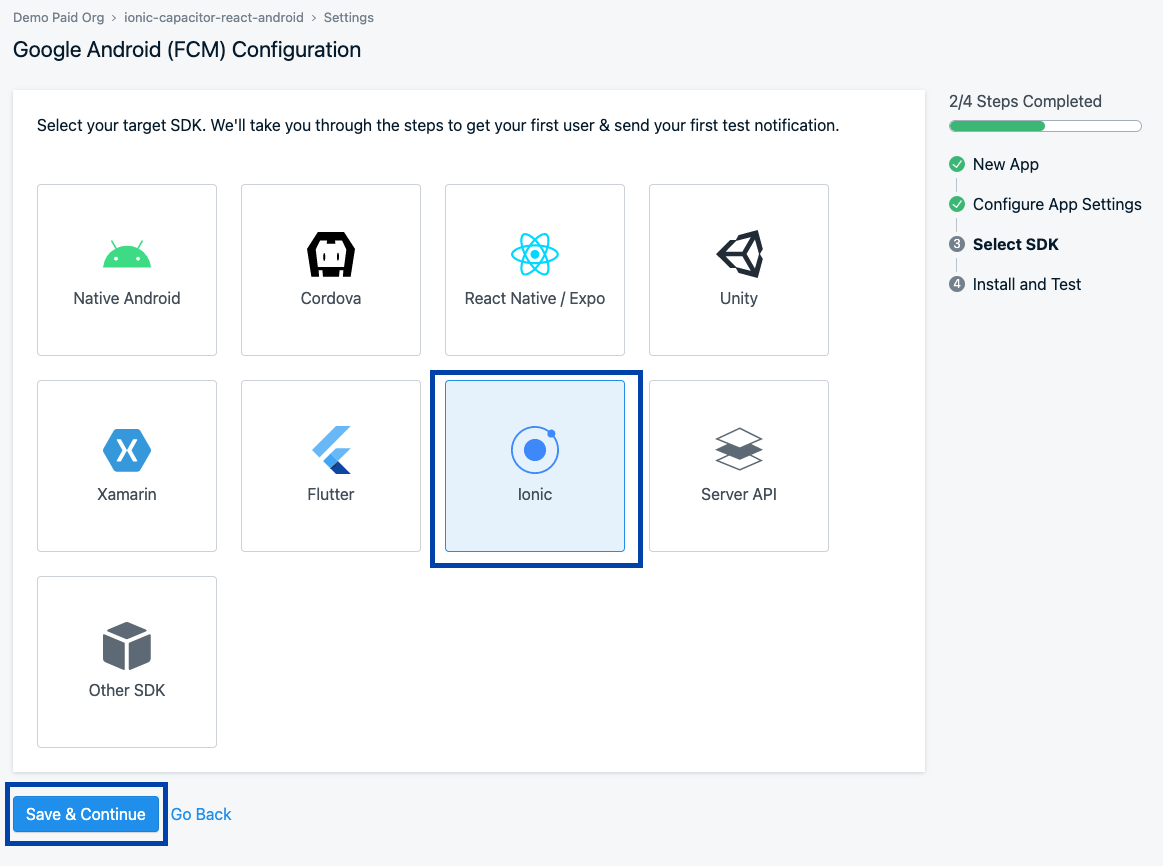
Now select your target SDK. We'll take you through the steps to get your first user and send your first test notification.
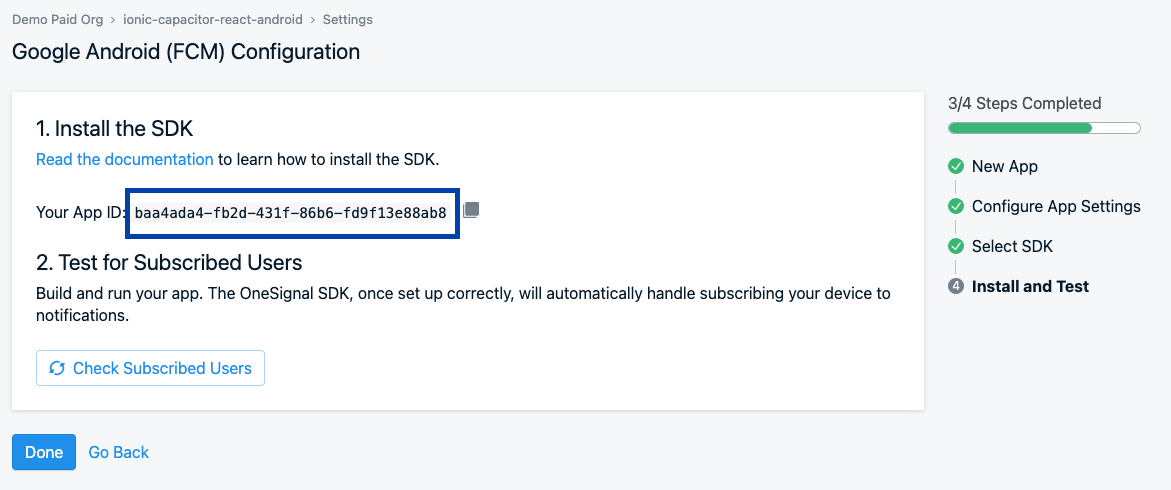
In the next screen that appears, you will see your app ID — copy that app ID because you will use it inside of your Ionic application. DO NOT click to Check Subscribed Users or Done yet.
Part 2: Push Notification Setup For Android
Now that you’ve collected the necessary items to add push notifications to your Android app, the next step is to make your Ionic app aware of OneSignal so that it can receive notifications.
Creating Your Ionic + Capacitor (React) App
Inside your terminal, run the following command to add the Ionic project globally in your machine to use Ionic in your command line.
npm install -g @ionic/cliNext, run the following command to create a new Ionic + Capacitor (React) project using the Ionic CLI. You will be asked to select a framework, select React.
ionic startWhen asked to enter a project name, you can enter whatever name you want. In my case, I named my project OneSignal-Ionic.
You will also be asked to select a template. Feel free to select whatever template you’d like. In the example below, I have selected tabs as the template.
Adding OneSignal To Your Ionic Application
To guide you through this process, I’m using a simple Ionic React Android app that illustrates how to integrate the OneSignal SDK. It is running on the Cordova npm package onesignal-cordova-plugin release.
To begin, add your desired platform to the project. For my app, I chose Android as my desired platform by running: ionic capacitor add android. Then, install the OneSignal Cordova plugin inside the project by running npm install onesignal-cordova-plugin. The ionic capacitor build android command will open the Android build in Android Studio.
After building your Ionic application into a new Android app, run the cap sync command (one time only) by entering npx cap sync.
At the top of you App.tsx file, import the OneSignal npm package to your component.
import OneSignal from 'onesignal-cordova-plugin';Add the following initialization code to the App.tsx file. Make sure to add your app ID, which you previously copied during Google Android FCM Configuration.
// Call this function when your app starts
function OneSignalInit(): void {
  // NOTE: Update the setAppId value below with your OneSignal AppId.
  OneSignal.setAppId("YOUR_ONESIGNAL_APP_ID");
  OneSignal.setNotificationOpenedHandler(function(jsonData) {
      console.log('notificationOpenedCallback: ' + JSON.stringify(jsonData));
  });
}
After creating the OneSignalInit() function, you are going to call it when your app starts. In the App.tsx file, add the following line of code:
OneSignalInit();
Finally, build your app again by running ionic capacitor build android and opening the Android Studio project.
I recommend you run the application on an actual Android device to test the notifications. To do so, you will need to connect your Android device and enable developer mode.
Once you have connected to the device and enabled developer mode, run the application on your device by selecting your device as the target device. In my example, I’m running the app on a Google Pixel 5.
Once you have opened the application on your device, the device will be automatically subscribed to the notification. Now, your device will be able to receive notifications sent by OneSignal.
To complete the setup process, return to your OneSignal dashboard to the point at which you previously left off. Click on the Check Subscribed Users and a green message will appear.
Click on the Done button.
Send A Push Notification
It’s time to send your first web push notification! To do so, log in to your OneSignal account and navigate to the Dashboard tab. On the dashboard page, click on the blue button that says New Push.
Note: Notifications are enabled on Android devices by default, but can be disabled by users via their phone settings. If you have manually disabled your notifications, make sure you enable notifications again in order to test how they work.
You will be redirected to a new window that will allow you to customize your push notification. Under Audience, make sure that Send to Subscribed Users is selected. Then, create your message by adding your message title, content, and image. Because this is the first notification your subscribers will receive, you may choose to craft a simple welcome message to confirm that they've been subscribed and reinforce the value that notifications will provide.
Under the Delivery Schedule section, select Immediately and Send to everyone at the same time to send to all your current push subscribers. If you have just finished setting up your OneSignal account, chances are you're the first and only subscriber. If your app or website is heavily trafficked and other users have already opted in to receive push notifications, you may want to select Send to a particular segment(s) to test your message out on a specific audience. When you're ready to send your message, click on the blue Review and Send button at the bottom of the screen.
A small popup will appear for you to review your message. Once you are satisfied, click on the blue Send Message button. You should receive a web push notification on your device! 🚀
Now, you can keep expanding your code to make use of different features of the OneSignal SDK across your Ionic app by passing the OneSignal variable to different components. To learn more about the Ionic SDK visit our Ionic push SDK documentation.
Stay Connected
Want to share your feedback and test out new features before they're released? Join our developer community to take advantage of these benefits and more.
Join our Developer Community